Sleeve Hem Button Options for Jackets and Suits

Proper Cloth offers a variety of sleeve hem button options for jackets and suits. Here we explain each option, its features, and why you might choose one over another.

Note: You can change the sleeve hem button style by clicking the ‘Customize’ button on any jacket or suit product page on the Proper Cloth site.

Four-Button Functional Kissing

This is our standard and default option, featuring four size 24L buttons. The buttons are kissing, and there is a 7/16″ space between the buttonholes. This is a classic option in which the buttons overlap slightly (often referred to as ‘kissing’), highlighting the custom and high-quality nature of the jacket. It is customary to wear this option with the last (bottom) button undone to demonstrate that the buttons are functional.

Unfinished Sleeve Hem

This option has no sleeve buttons or cut buttonholes. When you choose this option, you will also receive eight extra size 24L buttons with the standardly included spare buttons, which you can give to your tailor to customize your sleeve hem should you so choose. Note that the hem will arrive tacked in an “X” shape and that the tack should be removed before wearing the jacket. This option is good for those who wish to customize buttonhole size, placement, or button type with their own tailor.

One-Button Functional

This option features one size 32L (large) button. This is our most minimal option, and is good for more formal garments.

Two-Button Functional

This option features two size 24L buttons. The space between the buttonholes measures 1 1/8″ (which is equal to the button width). This is a classic Ivy League style detail.

Three-Button Functional Non-Kissing

This option features three size 24L buttons. The buttons are not kissing, and there is a 9/16″ space between the buttonholes. This is a more streamlined option than our standard four-button option.

Four-Button Functional Non-Kissing

This option features four size 24L buttons. The buttons are not kissing, and there is a 9/16″ space between the buttonholes. This is a classic option for those who do not want overlapping buttons.

Gift Cards – Frequently Asked Questions

How do I buy a Proper Cloth gift card?

Purchase a Proper Cloth Gift Card.

Online gift cards can be sent immediately (or at a specified date in the future) via email.

Physical gift boxes can also be purchased online and shipped to the recipient. Customers in New York City can purchase gift boxes in-person at a Proper Cloth showroom.

How do I send an email gift card at a later date?

After entering the name, email address, and personal message for the recipient, click ‘Chose a Date’ (rather than the default ‘Send it Now’) and select the preferred delivery date.

How do I redeem a Proper Cloth gift card?

At checkout, you’ll find the Enter Gift Code field to the right, just below the Order Detail section. Enter the gift code and click Apply to update your order total.

check out with gift code

Do gift cards expire?

No. Proper Cloth gift cards do not expire.

Can I redeem a gift card in-person at the Proper Cloth showroom?

Absolutely. We recommend scheduling an appointment to meet with one of our fit specialists. In-person, we can help you (or the gift recipient) create your custom clothing sizes, learn more about fabric and style options, and place an order using the gift card.

Can gift cards be applied to accessories and products other than custom shirts?

Yes. Gift cards can be applied to any Proper Cloth custom-made or stocked product.

Can I apply multiple gift cards to a single order?

Yes. Please contact our Support Team to request that your gift cards be combined or converted to store credit.

What happens if a gift card is purchased with a fraudulent credit card?

If it is determined that a gift card was purchased using a fraudulent credit card, or through other unlawful means, Proper Cloth reserves the right to cancel that gift card, cancel any order that was placed using that gift card, and remove any store credit that may have been added to an account related to the use of that gift card. Due to a recent increase in fraudulent activity, we would strongly discourage any customer from purchasing a Proper Cloth gift card from any site other than www.propercloth.com.

What Is a Pant Break?

Featured

Types of Pant Break

what is a pant break

Pant or trouser “break” refers to the fold in the fabric that occurs at the bottom of the pant leg as it rests on the shoe. This fold “breaks” the clean line of the trouser drape, hence the name. The proper amount of break in a trouser fit is subject to personal preference, and will affect the visual style and fit of the pants. Both the taper through the lower pant leg and the length of the inseam will affect how much of a break pants have.

Note that this information is based on traditional lace-up dress shoes. Loafers tend to have a lower shoe back height, which can affect how much sock is exposed and where the bottom hem of the pant leg hits the shoe.

full break

Full Break

Full Break

A full break is indicated by a significant amount of fabric pooling and folding at the ankle and a wider leg opening width. This is the most old-school and traditional of the break options, and works for looser fitting trousers and people with a more traditional style. To achieve a full break, the length of the trousers should reach well beyond the ankles to at least midway down the back of the shoe, and the opening width should be wide enough for the leg opening to fit around the laces.

a pair of pants breaking half way

Half Break

Half Break

A half break is a more modern alternative to a full break. This look can work well for a slim fit trouser, and is created by some fabric pooling at the top of the shoes with no sock exposed at the ankle. The trouser length should reach the middle to upper part of the back of the shoe and have a notable but not-too-significant bend in the fabric at the front of the trouser bottom. The leg opening width can be cut relatively slim for a more modern business style.

pants with no break

No Break

No Break

Trousers have no break when the length of the pant leg just kisses the top to the shoe, barely touching the shoe’s laces and the top of the back of the shoe. A small amount of ankle and/or sock is exposed when you’re standing. This is a more modern look and is great for office wear, and it works well with more traditionally slim or relaxed trouser fits though is often worn with very slim fits and a more aggressive taper through the lower leg.

pants with negative break

Showing Ankle, or Negative Break

Showing Ankle, or Negative Break

A bolder statement can be made with an even shorter inseam length that shows ankle and/or socks. The pant leg opening will hit above the back of the shoe and not touch it. A great look for a trendy or less formal environment.

For a traditionalist view on pant break, you can check out what the guys over at Gentleman’s Gazette had to say. That said, break, drape, leg-width tend to go in and out of fashion. You can try out different styles and find the one you like, or you can have a wardrobe with variety, bringing out different lengths for various occasions. And of course, you can always have pants tailored. For a deep dive on what a tailor can and can’t do, check out this post.

What’s the Best Way to Create a Custom Shirt Size?

If you’re new to Proper Cloth and are thinking about ordering your first custom dress shirt, you may find all the various size methods a bit confusing or daunting.  Here is the general advice we give folks who are trying to figure out which size method is best for them.

You want to get started now: Smart Sizes

If you’re a busy guy and just want to get the process started as soon as possible, we highly recommend our Smart Sizes size method.  Answer these 12 questions as best you can and we’ll generate a custom size for you.  Smart Sizes leverages complex algorithms based on thousands of other customers sizes and is incredibly accurate. Generally speaking, this size method will work much better than just selecting a standard size based on collar size, sleeve length and type of fit. Smart Size – get started, or update your answers.

You live in New York: Schedule an appointment

If you live in New York and have the time to come by one of our showrooms then doing so can certainly produce the best fit for you in the first iteration.  Our fit experts will take your measurements, have you try on a test shirt, and work with you to determine exactly what fit you’re going for. Conveniently, you’ll also be able to see the fabrics and styles in person. Book an in-person appointment through our online schedule.

Modify A Standard Size

Start by choosing a Standard Size that typically works for you. You’ll have a chance to see the various size parameters associated with the Standard Size chosen, then modify them to save a custom size of your own. Create a custom shirt size by modifying a standard size.

You have a shirt that fits perfectly (or close): Measure a shirt

If you have a shirt that fits exactly how you want (or very close) and are comfortable following our videos and using a measuring tape, then measuring a shirt you already have at home is a great way to create your first shirt size. Enter measurements from a shirt to generate a custom shirt size.

You have a shirt that fits, but don’t trust your ability to measure: Mail us a shirt to copy

If you have a shirt that fits exactly how you want (or very close) and don’t mind mailing the shirt to us in New York, then we will be happy to have our experts measure your shirt for you.  Your shirt will be returned to you when we are done. Tips for sending in a shirt for Proper Cloth to measure and save to your account.

You’ve never had a shirt that fits right and you have a unique shape: Measure your Body

If you don’t have a shirt that fits exactly how you want and are comfortable following our videos and having a friend help you out, then measuring your body at home is a great way to create your first shirt size. Enter your body measurements to generate a custom shirt size.

Regardless: Perfect Fit Guarantee

Regardless of how you create your first size, we’re here to help you.  Our Perfect Fit Guarantee is unrivaled and we will do whatever we can to make sure you’re happy with your fit.  Furthermore, our staff is trained to assist with size recommendations via our ‘Fit Advice Request‘ service. We’ll ensure a smooth process to correcting your custom size if your first try is not ideal.

High-Quality Tailored Clothing

Featured

When choosing a suit, sport coat, or trousers, you’ll want to make sure you’re getting a high-quality garment. There are several details that will help you identify a well-made tailored garment that will stand the test of trend and time. We’ve worked hard to ensure our tailored garments exceed those standards.

elements of suit jacket construction

Elements of high-quality jacket construction.

High-Quality Fabrics

When designing your suit, it’s important to pay close attention to the fabric to ensure it complements your lifestyle. Whether you’re looking for a classic business suit that can be worn year-round, or a casual sport coat for warmer climates, the garment’s fabric will play a large role in its style and comfort. Though it can be difficult to sort through details like fabric composition, weave type, and thread count, we make it easy by ensuring all of our fabrics are of the highest quality and from world-renowned fabric mills. The most common fiber used for high quality tailored garments is wool. 

Fabric Reserve

A fabric reserve is the extra fabric included at the seams of a garment which allows for tailoring. Our tailored garments are made–to–measure, and as such you shouldn’t need many adjustments, if any at all. That being said, if you do want to have a tailor make slight adjustments for any reason, we give you the option to do so by building fabric reserves into all of our garments. We’ve laid out by how much each dimension of our garments can be altered by a tailor.

High-Quality Jackets

Bemberg Lining

Although the lining of your jacket and trousers generally goes unseen, it plays a key role in the wearability of your garments. The ideal lining material for a jacket or trouser is Cupro, which is a cotton fabric with the feel and friction resistance of silk. Some brands line their suits with polyester that feels similar to Cupro, but it locks the heat in and offers little breathability. One of the benefits of using a natural fiber lining like Cupro is that it wicks moisture away from the body. We specifically use Bemberg Cupro, which, because it’s very light, silky, anti-static, and durable, is considered the gold standard of Cupro fabrics. It’s also biodegradable and a renewable natural resource.

Functional Sleeve Buttons & Authentic Horn Buttons

Many off-the-rack jackets feature non-functional buttons affixed to the jacket sleeve to allow for significant sleeve length adjustments. When you’re ordering a made–to–measure jacket, however, there’s no reason to forego the added class and practicality functional buttons can provide. Many people choose to leave one or two of their sleeve buttons undone to display the quality of their jacket. You could even undo all the sleeve buttons and push up the jacket sleeves for a much more casual look. All of our tailored jackets have functional buttons, unless you opt for our ‘unfinished’ sleeve option.

Button material also plays a part in the durability and look of your garment and, of course, its buttons. Horn buttons are incredibly durable, and are therefore very unlikely to crack or break with wear. They’re a great choice in terms of longevity, but also have stylistic benefits. Each horn button is unique, differing in color and pattern, and adds subtle one-of-a-kind visual detail to your jacket and trousers. Additionally, our natural horn buttons are ethically sourced to prevent animal cruelty.

Floating Canvas

Canvas adds shape to a jacket, allowing the fabric to drape nicely over the chest and torso. While some companies will fuse or glue the jacket fabric, or “shell,” to canvas or interlining, we attach the canvas to the main fabric by loosely hand stitching the two together. This is called a “floating canvas,” and it provides more flexibility, reduces strain on the shell, and allows the canvas to more easily mold to the wearer’s body over time.

While a floating canvas is the ideal design for most jackets, an unstructured jacket with no canvas at all can be just as high quality. In addition to our more structured jacket styles, we also offer the Waverly construction option which features no canvas, shoulder padding, or sleeve head to provide a more natural, casual look with the same high-quality materials we use for our structured jackets.

Rolled Jacket Lapel

A signature of quality hand-work in a well-made canvassed jacket is a roll at the bottom of the lapel. This roll forms naturally if the canvas inside the lapel is of superior quality and design. The structure and flexibility provided by the canvas creates a slight curl in the lapel just above the top button. 

High-Quality Dress Pants

elements of high-quality trousers

Elements of high-quality trouser construction.

Fully Curtained Waistband

A curtained waistband provides an additional layer of material around the inside of the waist of a pair of trousers. This gives the trousers a more finished, clean look by covering the seam work inside them and serves a functional purpose by taking pressure off the garment’s fabric, reinforcing the waistband. It allows the pockets of your trousers to drape properly and stay in place, and also adds slight padding around the hips to increase comfort. All of our trousers are constructed with a curtained waistband to ensure a comfortable and durable fit.

Trouser Heel Guard

A heel guard is a strip of fabric sewn around the interior of the bottom hem of your trousers. This extra fabric layer protects the hem of your pants from your shoes and the ground, and adds weight to the hem so your trousers drape nicely over your shoes.

Choosing the Optimal Chest Posture Setting for Shirts

A shirt in need of a chest adjustment (left) vs. a jacket that fits properly (right).

How the chest should fit

The perfect fit of a dress shirt at the chest is a matter of personal preference. If you prefer a more relaxed fit, you can make the chest as large as you like. If you desire a tailored, slim look, you’ll want to reduce the Chest Width as much as possible without going so tight that it impacts comfort or produces unattractive pull lines across the chest. The fit of the chest should be about equal all the way around the shirt, at the front of the chest and at the back.

How the chest posture adjustment works

Changing this setting moves fabric from the back of the shirt to the front, or from the front of the shirt to the back. The overall chest measurement remains the same; fabric is simply redistributed to achieve the optimal fit. This adjustment increases the chest front or chest back by 1” increments.

Determining the optimal chest posture setting

With the collar of the shirt buttoned all the way up, stand up straight with your arms at your side. Look straight ahead and be sure to keep your shoulders relaxed and comfortable (don’t push your shoulders back or hunch them forward at all).

In this position, if you experience tightness at the chest front and simultaneously have excess fabric around the chest back/upper back area, a Chest Forward adjustment can improve your fit. This adjustment redistributes fabric towards the front of the shirt without increasing the total chest measurement. This alleviates chest front tightness and allows for a cleaner look on the back of the shirt. If you have a very slim fit, be aware that this adjustment will give you less range of motion when reaching up above or in front of you.

If you experience tightness at the chest back/upper back and simultaneously have excess fabric around the chest front area, a Chest Back adjustment can improve your fit. This adjustment redistributes more fabric towards the back of the shirt without increasing the total chest measurement. This alleviates chest back tightness and allows for a cleaner look on the front of the shirt. 

How Proper Cloth Adjusts Shirt Dimensions for Shrinkage

Updated 2/21/2023

Most shirts are expected to shrink by some amount and at Proper Cloth we take this into account. It is generally not necessary to understand why or how this works. The important thing to know is just that we automatically adjust the dimensions used to produce a shirt such that the shirt will match your intended dimensions after it is laundered 1-2 times.  To be clear, for most shirts we intentionally make the shirt larger than the dimensions specified, so that after the shirt is washed it will fit correctly and be consistent with other shirts made from different fabrics. 

We make three types of adjustments to shirts now: Standard Allowances, Counter-Shrinkage Adjustments, and Counter-Stretch Adjustments.  These are explained below.  

Standard Allowances

Standard Allowances are adjustments that we apply to all shirts, regardless of how the fabric is expected to shrink. There are two Standard Allowance adjustments: 

  • We add 0.4″ to the Collar Around dimension
  • We add 0.3″ to the Sleeve Length dimension (long sleeve shirts only)

Standard Allowances are not intended to compensate for shrinkage.  These allowances are only necessary to match industry standards (and customer expectations) for how the collar size and sleeve length of a shirt should fit when new.  

If a shirt has Counter-Shrinkage or Counter-Stretch Adjustments applied, Standard Allowances are applied in addition to these adjustments. 

Counter-Shrinkage Adjustments

Counter-Shrinkage Adjustments are adjustments made to a shirt’s size so that after 1-2 launderings according to the suggested care instructions, the shirt will fit as intended (matching the Ordered Dimensions plus Standard Allowances). Counter-Shrinkage Adjustments are: 

Applied Uniquely to Each Fabric

Every fabric shrinks differently, and we use different Counter-Shrinkage Adjustment factors for each fabric. To calculate the expected shrinkage of a fabric we use a mix of data provided by fabric mills, our own wash tests, and customer feedback. 

Applied as a Percentage

Unlike Standard Allowances, Counter-Shrinkage Adjustments are applied on a percentage basis. This means the amount a dimension is adjusted will be larger for larger dimensions than it will be for smaller dimensions.  

Applied Uniquely to Each Shirt Dimension

In addition to different fabrics shrinking differently, not every dimension of the shirt is expected to shrink by the same percentage. This is partly due to fabrics shrinking differently in length and width, but also due to the way a shirt is constructed. For example, some parts of a shirt are constructed with one layer of fabric, some with multiple layers of fabric, and some parts have interlinings sewn into them. We modulate the expected shrinkage percentage accordingly for each shirt dimension.

Counter-Stretch Adjustments

In some cases, a fabric will actually become looser when it is laundered.  This situation is less common, but prevalent enough for us to want to address it.  In these cases, we apply Counter-Stretch Adjustments (think about them as negative Counter-Shrinkage Adjustments) to the shirt.  Counter-Stretch Adjustments work exactly the same as the Counter-Shrinkage Adjustments described above, just in the opposite direction – meaning we intentionally make a shirt smaller than ordered so that after it is worn and laundered it will measure close to its specification. 

Understanding How Your Shirt Dimensions Were Adjusted

Because the formulas used to adjust the shirt dimensions are quite complex, it is hard to explain and display exactly how your size will be adjusted for a shirt being made in each fabric.  However, once you have placed an order, in your order history, you can now (as of 2/18/2023) click to see the “Pre-Wash Dimensions” of the shirt.  These are the dimensions that the shirt should measure when it is first delivered to you, prior to it being worn or laundered.  

Image showing how you can see the Pre-Wash Dimensions for your shirt in your Proper Cloth account.

How to Disable Shrinkage Adjustments

If for any reason you do not want your shirt to be automatically adjusted for shrinkage, you can turn this option off in your Account Details. Sign in to your account and scroll to the bottom of the page.  In Advanced Details, change “Yes Auto-Adjust” to “No, Make as Specified”.  

Image showing where to disable shrinkage adjustments in your Proper Cloth account.

Changing this setting will affect orders placed after you make the change and have no effect on orders already placed. 

While we generally encourage customers to leave this on, you may want to turn it off if you’re having a shirt made for a special event and won’t have time to launder it prior to the event. That being said, most dress shirt fabrics don’t shrink very much so it won’t make a huge difference either way. 

Importance of Following Care Instructions

How you wash your shirts will make a big difference in how much it shrinks.  For this reason, we strongly encourage customers to follow the specific shirt care instructions assigned to the shirt you purchase from Proper Cloth.  Doing so will help ensure that your shirts fit the way you intend after they are laundered and that different shirts you order using the same size will fit consistently. 

How to Order a Short Sleeve Shirt

To order a short sleeve shirt, you’ll first want to create a short sleeve shirt size in the Custom Sizes section of your account. You can use our handy tool for converting your long sleeve dress shirt size into a short sleeve size here: Convert Long Sleeve to Short Sleeve Size. 

Then, head to the Design-A-Shirt Tool. In the Style tab, click “Cuff/Sleeve” and select the Short Sleeve option to view the short sleeve design options.

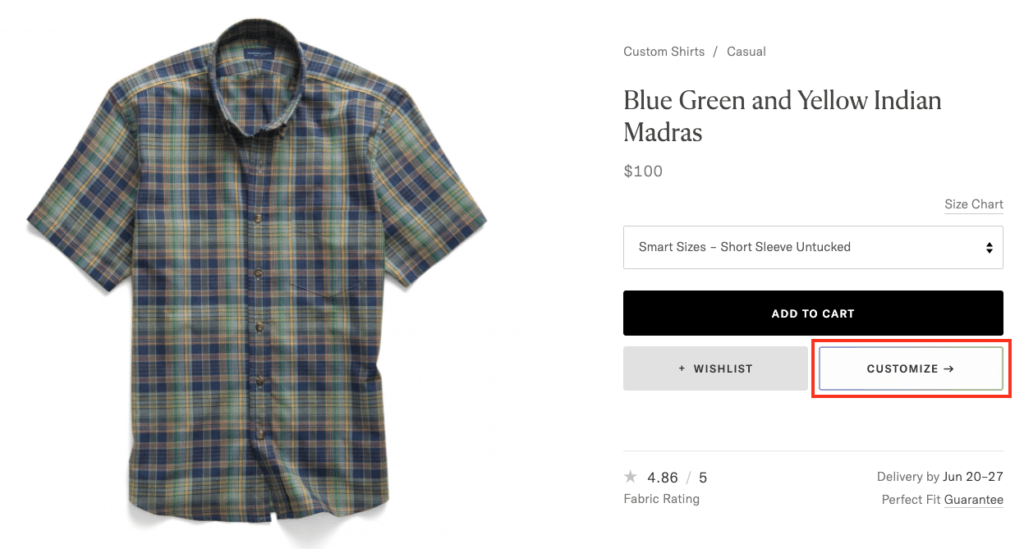
You can also browse a selection of pre-designed short sleeve shirts in our shirt gallery. If you’ve selected a shirt but would like to modify the design further, just click the “Customize” button to the right of the shirt photo to edit as you wish.

Click the “Customize” button to modify the design elements of a shirt.

How Jacket Posture Should Fit

How It Should Fit: Laying flush against your neck

When standing upright with your arms at rest, the perfect jacket Posture allows for the jacket collar to rest comfortably on your neck. There should not be a significant gap between the jacket collar and the back of your shirt collar, nor should the jacket collar push up against the back of your shirt collar such that a bump forms behind the jacket collar. The goal is to have the jacket’s collar align with your natural posture, positioning the collar so it can lay flush on your neck, neatly meeting with the shirt collar.

Perfect Posture Setting: Jacket collar lays smooth and flush against the neck.

The jacket Posture setting is set to Standard as a default on all sizes. The Standard setting will work for most people. Changing this setting moves the jacket collar forward or backward relative to your natural posture and shoulders. We offer six Posture settings to accommodate a wide range of body types:

  • Standard (Default)
  • Neck Forward 0.3” 
  • Neck Forward 0.6”
  • Neck Forward 0.9”
  • Neck Back 0.3”
  • Neck Back  0.6”

Signs That You Need a Neck Forward Posture Setting

If your jacket collar sits such that it is not touching the back of your shirt collar, consider applying a Neck forward adjustment. Selecting from among Neck Forward 0.3″, Neck Forward 0.6″, or Neck Forward 0.9″ will depend on the severity of your forward neck posture. Generally, the more extreme the forward slant of your neck, the larger the space between the jacket and shirt collars, and thus the higher the degree of “Neck Forward” setting you’ll want to implement.

Signs That You Need a Neck Back Posture Setting

If the collar of your jacket is pushing up against the back of your shirt collar and creating a bump of material to form in your upper back below the jacket collar, then you’ll want to select a Neck Back setting. Selecting Neck Back 0.3″ or Neck Back 0.6″ will depend on the severity of your upright neck Posture. Generally, the more extreme your upright posture, the higher degree of Neck Back setting you’ll want to implement.

Consider Shoulder Slope Simultaneously

Keep in mind that rolls or bumps behind your jacket collar can also indicate a need to lower or raise the Shoulder Slope. Because the Posture and Shoulder Slope show similar signs of an improper fit, it is important to consider adjusting both of these aspects of fit when assessing the Posture.

Note: In the event that the jacket shows signs of requiring lowered shoulders but also has a roll behind the collar, the Posture should be set to Neck Back.

Jacket vs. Shirt Posture: Should they be the same?

Jacket Posture does not necessarily need to match the shirt’s Neck Posture. The need for a Neck Posture adjustment to one’s shirt size, however, is generally greater than the need for a Posture adjustment to one’s jacket size. For example, if you have a second or third degree (0.5″ or 1.0″) Neck Posture adjustment in your shirt size, you may benefit from a single degree of adjustment (0.3″) to your jacket size.

Jacket Button Stance Options

Button stance measures the placement of the buttons on the front of a jacket. The Standard placement should work well for most people, but it can be changed relative to your preferences or torso length if desired. We offer five different options: Lower 1″, Lower 1/2”, Standard, Raise 1/2″, Raise 1”.

  • Selecting Lower 1″ lowers the buttons on the front of the jacket by 1″ from our Standard position. 
  • Selecting Lower 1/2″ lowers the buttons on the front of the jacket by 1/2″ from our Standard position. 
  • Standard is the default setting. This automatically centers the buttons around the break point and midsection of the jacket.
  • Selecting Raise 1/2″ raises the buttons on the front of the jacket by 1/2″ from our Standard position. 
  • Selecting Raise 1″ raises the buttons on the front of the jacket by 1″ from our Standard position. 

Note: If there is more than one button on the front of the jacket, they will move as a group when the stance is changed. The space between them will remain the same.

Managing Your Custom Shirt Style Profiles

Creating A Style Profile

Proper Cloth offers the ability to save your favorite collar, cuff, pocket, placket, yoke, button, and monogramming options as a ‘Style Profile’ in your account. Style Profiles can be created and modified in the Design-A-Shirt tool.

After choosing a shirt fabric, select the style options (collar, cuff, etc.) that you’d like to save. Click the ‘Save Style’ button, enter a name for your Style Profile, and click save. Similar to saved shirt sizes, multiple Style Profiles can be saved in your account and easily applied to future orders.

Saved Style Profile 1

Configuring style options within the Design-A-Shirt Tool.

Naming and saving a Style Profile.

Naming and saving a Style Profile.

Modifying a Saved Style Profile

To modify an existing Style Profile, head to the Design-A-Shirt Tool. Select the profile you wish to modify from the Style Details dropdown menu. Modify any of the listed style elements as desired and click Save Style to save your changes. If you wish to create a new Style Profile rather than update/overwrite an existing profile, click Save Style As, enter a new name, and click save.

Selecting an existing Style Profile for modification.

Selecting an existing Style Profile for modification.

Click 'Save Style' to update an existing profile or 'Save Style As' to create a new profile.

Click ‘Save Style’ to update an existing profile or ‘Save Style As’ to create a new profile.

Renaming a Style Profile

To modify the name of an existing Style Profile, head to the Saved Style Profiles portion of your Proper Cloth account. Click the ‘Rename’ button next to the profile you choose to modify, enter the name as desired, and then click Save.

Click 'Rename', enter the new Style Profile name, and save.

Click ‘Rename’, enter the new Style Profile name, and save.

Set a Default Style Profile

To designate one Style Profile as your default style for future orders created in the Design-A-Shirt Tool, head to the Saved Style Profiles portion of your Proper Cloth account. Click ‘Make Default’ next to the profile of your choice.

Click 'Make Default' to set your default Style Profile. A Star will appear next to the default profile name when complete.

Click ‘Make Default’ to set your default Style Profile. A star will appear next to the default profile name when complete.

Deleting (Archiving) A Style Profile

To delete a Style Profile, head to the Saved Style Profiles portion of your Proper Cloth account. Click ‘Archive’ under the Style Profile you wish to remove from use.

To remove a Style Profile, click 'Archive'.

To remove a Style Profile, click ‘Archive’.

Reactivate an Archived Style Profile

To reactivate an archived Style Profile, click ‘All Styles’ in the top right corner. This will allow you to view both active and archived profiles. Then, click ‘Make Active’ next to the Style Profile you wish to reactivate for use in the Design-A-Shirt Tool.

SHOW: All Styles, and click 'Make Active' to reactive an archived Style Profile.

SHOW: All Styles, and click ‘Make Active’ to reactive an archived Style Profile.

The Polo Shirt: A History & Exploration

The history of the polo shirt adoption in the West streches back to India in the 1850s. British soldiers stationed in Manipur, India, witnessed polo players wearing long-sleeved, cotton knit shirts during their matches. The shirts were lightweight and breathable and the stretch in the fabrics made them perfect for outdoor activities, and the collars were pinned down so they wouldn’t flap around as the players moved (which eventually gave rise to the “Button Down Polo”). The soldiers adopted the shirts for their own purposes and brought them back to the U.K. 

polo shirt

It is believed that John E. Brooks, the founder of Brooks Brothers, initially introduced the style to the U.S. after a trip to London in the 1890s. The style gained popularity among tennis players and other athletes in the 1930s after tennis player René Lacoste began selling “Lacoste” branded polo shirts with a crocodile emblazoned on them. The polo continued to make its way into mainstream fashion over the years, and the world-wide recognition of its preppy, sporty style today is thanks in large part to Ralph Lauren and his branded “Polo Ralph Lauren” shirts, which launched in 1967.

a navy polo

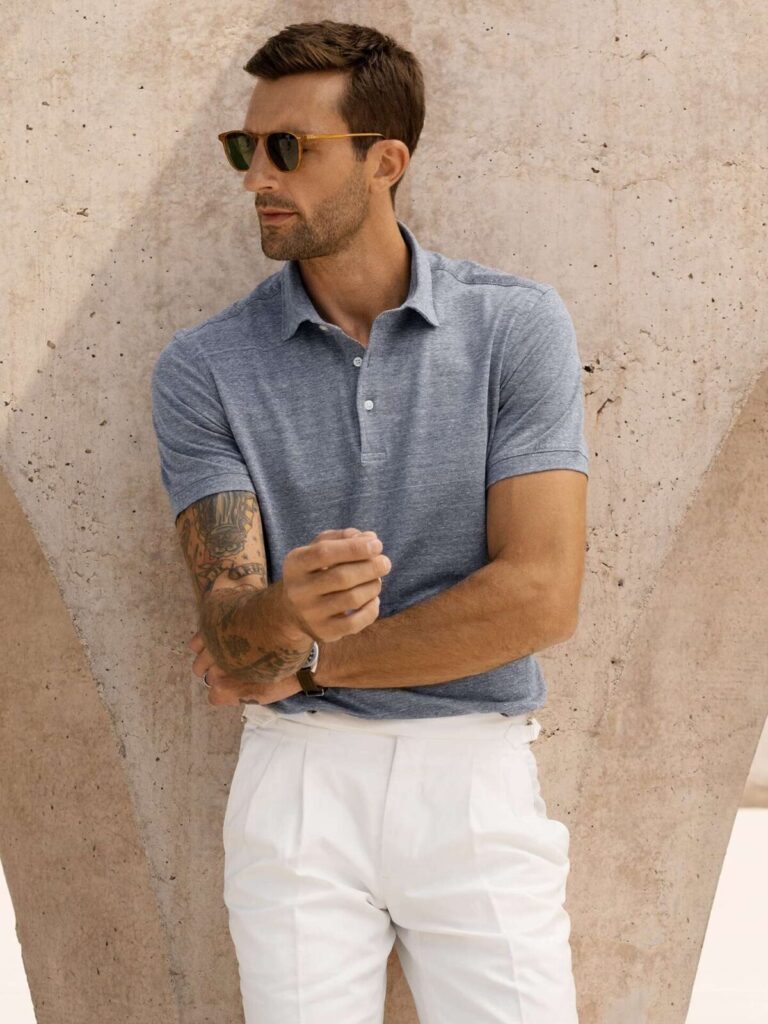
Today polos are worn in both sport and casual situations. The materials from which they are made vary widely, from synthetic performance blends to recycled wood pulps like Refibra™, though they are all generally stretchy and knit in structure. The ideal polo shirt fit is fairly consistent across the board—relaxed but not too slim to allow for comfort and movement. To learn how to create your perfect polo shirt fit, click the following link: How to Achieve the Perfect Polo Shirt Fit.

For a suave deeper dive into the polo, check out this longer article from The Rake Magazine. Proper Cloth offers a range of polos, from knits to linen blends, and long-sleeve varieties for colder months. You can also create a custom size and make customizations to specific details. Putting a personal touch on this already-easy-to-pair garment makes it a wardrobe staple.

Short Sleeve Design Options

We offer a few different short sleeve design options: (Plain) Short Sleeve, Cuffed Short Sleeve, and Polo Short Sleeve. Each design option has particular use cases you might consider when designing your short sleeve shirt.

(Plain) Short Sleeve

A clean, classic short sleeve finished with a 1” hem. Easy to roll up if you prefer an extra-short look.

The Plain Short Sleeve

Cuffed Short Sleeve

A short sleeve option with a 1 1/8” cuffed hem. It gives a short sleeve shirt a particularly relaxed look.

The Cuffed Short Sleeve

Polo Cuff Short Sleeve

This short sleeve option is only available for knit fabrics. The Polo Cuff has a 7/8” hem that gives your shirt a classic polo shirt look. Choosing the Polo Cuff option will make the Short Sleeve Opening Width measure 0.75” narrower than the specified Short Sleeve Opening Width in your size profile.

Measurement Tolerances for Proper Cloth Garments

While we do our best to sew each garment precisely to its specification every time, hand sewing and cutting fabrics, working with different fabric types, and applying different washes or finishes to garments will naturally result in small variations in just how precisely the finished garment matches the ordered dimensions.

Measuring Tolerance

There’s a second source of variation worth considering: measuring tolerance. This is the natural variance that comes from different people measuring garments by hand. Technique, tools, amount of force applied, and exactly where on the garment one measures can all produce slightly different results, even on the same piece. Measuring tolerance is a separate variable from sewing tolerance, and the two together can add to the perceived variance of a garment.

Laundering and Stretch of Garments

Shirts

The measurement tolerances in the table below represent the acceptable range of precision relative to your ordered shirt dimensions. Out of the box, your unwashed shirt should measure within these tolerances relative to the Pre-Wash dimensions. 

After laundering the shirt according to the care instructions on the tag, it should measure within these same tolerances of your Ordered dimensions.

Once you launder a garment, continued wear and cleaning can affect how closely it continues to match these tolerances. While we automatically adjust the dimensions used to produce a shirt such that it will match your Ordered dimensions after it is laundered 1-2 times, over a long enough time of washing and wearing shirts, measurements may gradually shift.

Using different laundering methods will have different effects — high-heat drying tends to shrink fabric, while a commercial ‘wash and press’ may stretch it out — and depending on the method, measurements may fall outside the tolerances. Even if your preferred cleaning method is not the recommended method on the tag of your shirt, we can generally support you with finding the right size, but the tolerances below will no longer apply. The key to honing in on the right size is staying consistent with whichever care method you choose, allowing us to adjust your saved size relative to the experienced resulting fit. Understanding how your garment was cared for, though, is necessary for us to give you the most accurate guidance.

Casual Pants

Casual pants typically undergo a washing process during production, so they arrive at your door already measuring within tolerance of your Ordered dimensions. Following the care instructions on the tag will help ensure they stay within tolerance going forward, while straying from the recommended care method is more likely to push measurements outside of range. 

Pants tend to stretch more than shirts or tops in general, since more force is applied to them during everyday wear and movement. This is most noticeable in three key areas: hip width, back rise, and waist width. Even with consistent, correct care, these areas are expected to get larger over time compared to other areas of the garment.

Tailored Clothing

For tailored clothing, the measurement tolerances below assume dry cleaning only. Any laundering involving water will invalidate them and will likely damage the garment itself. Stretching and relaxing of certain dimensions can also be a factor over time and wear, with fabric also playing a part. For example, a slim sized linen trouser can experience mild stretching in the hip width, back rise, and waist width after wear. 

Garment Measurement Tolerance Guides

The following are the measurement tolerances that we consider acceptable for each Proper Cloth product type.

Shirts

Measurement tolerance for shirts:

Dimensions Tolerance
+ –
Chest Width + 0.4″ – 0.4″
Midsection Width + 0.4″ – 0.4″
Bottom Width + 0.4″ – 0.4″
Yoke/Shoulder Width + 0.4″ – 0.4″
Sleeve Width + 0.3″ – 0.3″
Center Back Length + 0.5″ – 0.5″
Center Front Length + 0.5″ – 0.5″
Sleeve Length + 0.5″ – 0.5″
Collar Around + 0.3″ – 0.3″
Cuff Length + 0.3″ – 0.3″

Note: The tolerance measurement of the Chest Width, Midsection Width, Bottom Width, and Sleeve Width is doubled to calculate the tolerance for the full circumference around the shirt at those points. For example, the tolerance for Chest Circumference is + or -0.8”, which is double the Chest Width tolerance of + or -0.4”.

Jackets

Measurement tolerance for jackets:

Dimensions Tolerance
+ –
Shoulder Width + 0.3″ – 0.3″
Chest Width (at armhole) + 0.4″ – 0.4″
Midsection Width (at top or middle button*) + 0.3″ – 0.3″
Hip Width (6″ below top or middle button*) + 0.3″ – 0.3″
Center Back Length + 0.3″ – 0.3″
Sleeve Length + 0.3″ – 0.3″
Sleeve Bicep Width + 0.3″ – 0.3″
Sleeve Opening Width + 0.3″ – 0.3″

Note: The tolerance measurement of the Chest Width, Midsection Width, Hip Width, Sleeve Bicep Width, and Sleeve Opening Width is doubled to calculate the tolerance for the full circumference around the jacket at those points. For example, the tolerance for Chest Circumference is + or -0.8”, which is double the Chest Width tolerance of + or -0.4”.

Pants

Measurement tolerance for trousers:

Dimensions Tolerance
+ –
Waist Width + 0.3″ – 0.3″
Hip Width + 0.4″ – 0.4″
Thigh Width + 0.4″ – 0.4″
Knee Width + 0.3″ – 0.3″
Leg Opening Width + 0.3″ – 0.3″
Front Rise + 0.3″ – 0.3″
Back Rise + 0.4″ – 0.4″
Total Rise + 0.7″ – 0.7″
Inseam Length + 0.5″ -0.5″

Note: The tolerance measurement of the Waist Width, Hip Width, Knee Width, and Leg Opening Width is doubled to calculate the tolerance for the full circumference around the pants at those points. For example, the tolerance for Waist Circumference is + or -0.6”, which is double the Waist Width tolerance of + or -0.3”.

How Pants Should Fit: Waist Width

How It Should Fit: Comfortably hugging your waist

A well-tailored pair of pants should rest on your body without the need for a belt to hold them in place. Fastening the waistband should be easy. With the waistband closed and the pants zipped, the waistband and front of the pants should drape cleanly and free of tension lines when you are standing upright.

The Proper Cloth rule of thumb is that the waistband should fit firmly against the body, but still allow you to insert two or three fingers between the waistband and your body with relative ease. The waistband should not be so tight that fastening it requires much force or so loose that it sags and requires a belt to keep the pants up. The goal is to achieve a clean, polished appearance while feeling comfortable. 

Waist Width Too Small: Tension lines near the waistband

One sign that the Waist Width is too small is if you cannot button the pants. In this case, you can find your correct Waist Width by measuring the distance between the center of the button to the outer edge of the buttonhole while wearing them with the zipper fully closed. Divide that measurement in half and add it to the Waist Width in your saved pants size.

Another sign of a Waist Width that’s too small is the appearance of tension lines just below the waistband when the pants are buttoned/zipped up. Increasing the Waist Width a bit will relieve these horizontal pulling lines.

A third sign is if the pockets bend open noticeably at the hip area. This bending is referred to as “pocket flare.” A tight Hip Width will also contribute to pocket flaring. Because the Waist and Hip Widths are connected, it is important to consider them simultaneously in order to correct this issue. The pockets should lay flat against the pants. Otherwise, the fit will appear shrunken and uncomfortable. 

Waist Width Too Large: Baggy fit at the waist

One sign that the Waist Width is too large is if you can pinch a fold of the waistband fabric between your fingers while the pants are fastened. If you can pinch 0.5” or more of excess fabric at the waistband, you should consider reducing the Waist Width.

A Waist Width that is too large will also cause the pants to sag and appear bulky. The waistband should fit well enough that you don’t need a belt at all. If the waistband is so loose that it requires a belt, you’ll notice excess fabric folding across the waistband as the belt cinches the waistband to its ideal fit.

Understanding Vanity Sizing for Pants

Like pants from most retailers, the base sizing for our pants’ waistbands includes vanity sizing. This means that, for example, selecting the option for a 30” waist in the Smart Size quiz or when ordering/creating a size from one of our Standard Size options will produce pants measuring roughly 31.75” in the circumference, which will display as 15.9” Waist Width. 

All other dimensions, including Inseam Length, are true to measure. We recommend choosing the waist size you usually wear off the rack for pants or jeans. For exact garment measurements, refer to the dimensions provided on the size generator (as seen below).

Providing your waist size in the Smart Size quiz will generate a pants size with a “vanity size” adjustment to the Waist Width dimension. All dimensions, however, are customizable.
Choosing a ‘Standard Size’ of 32×30.5 for trousers yields a ‘vanity size’ Waist Width of 16.9” (33.8” in total circumference). All dimensions, however, are customizable.

How Pant Hip Width Should Fit

How It Should Fit: Closely following the seat

A well–tailored pair of pants should follow the curve of your rear and hips in a smooth, uninterrupted line between the waist and the thighs. When you zip or button up the pants there should be no folds of excess fabric, which indicates a loose fit, or tension lines, wrinkles across the front of the hips, or pulling across your backside, which indicate a tight fit.

A flattering, polished hip fit as seen from the front.
A flattering, polished hip fit as seen from the back.

Hip Width Too Small: Pockets flare

When you zip or button up the pants and stand upright, the pockets should lay flat against the side seam of the pants. A clear sign that the Hip Width is too small is if the pockets bend noticeably at the hip area. This bending is referred to as “pocket flare.” If the pants hug the hips too closely, the tension will cause the fabric to pull across the hips and the pockets to buckle and flare out. As a result, the pants will appear to fit too small and will likely be uncomfortable as well. Consider increasing the Hip Width if you see this. 

Hip Width Too Small: Fabric gathering at the hips, causing pocket flare.

Note: A tight Waist Width can also contribute to the pocket flaring. Because the Waist Width can influence tightness across the highest point of the seat, it is important to consider Waist and Hip Width simultaneously in order to correct the pocket flare issue.

Another sign that the Hip Width is too small is if the pants feel or look too tight across the seat. You may notice tension lines running horizontally across the seat or lines from the side pockets to the center back of the pants. Increasing the Hip Width will provide more space in the seat of the pants to alleviate this tension. In some cases you may also notice that the pants ride up along the center back seam. In this case, increasing Back Rise a bit in addition to increasing the Hip Width can help to ensure the backside of the pants provide adequate room.

Hip Width Too Large: Excess fabric in the seat

The Hip Width is too large if the pants appear to have too much fabric at your rear or show little to no definition of your hips. If you notice excess fabric folding vertically across your behind or near the center back seam, you should consider reducing the Hip Width. Even for gentlemen who prefer a classic or more traditional fit, the silhouette of the pants should drape cleanly over the hips with few wrinkles on your behind.

Hip Width Too Large: Excess fabric across the backside.

Note: A Back Rise that is too long can also contribute to a loose fit at the seat. Because the Back Rise and Hip Widths are connected, it is important to consider them simultaneously in order to correct Hip Width issues.

Jacket Construction and the Options Proper Cloth Offers

jacket construction shows canvas

A deconstruction showing the canvas inside the jacket shell.

The construction style of your custom jacket will affect both its formality and the way it drapes and forms to your body over time. With each construction option we offer, details like the canvas, shoulder padding, and sleeve head change to help achieve your desired look.

Canvas

Canvas refers to the intermediate layer of material between the outer jacket fabric and the inner jacket fabric, which together are known as the “shell.” The purpose of canvas is to provide structure, enhance fit, and allow the shell fabric of the jacket to drape cleanly over the body. Proper Cloth’s canvas is loosely stitched by hand to the shell, providing structure and preventing strain on the garment. The canvas will mold to the wearer’s body over time and provide an even better custom fit that lasts.

With Proper Cloth you can choose a fully-canvassed construction, a half-canvassed construction, or a construction with no canvas. Fully-canvassed construction is a truly premium choice, with the canvas extending from the shoulder down to the bottom of the jacket and throughout the lapel. It provides the best drape and the most structure. Half-canvassed construction extends the canvas from the shoulder down to the midsection and throughout the lapel, primarily adding shape to the chest. A construction with no canvas provides no additional structure to the jacket, and is a popular option for more casual sport coats.

Shoulder Padding & Sleeve Heads

Shoulder padding and the sleeve head affect the drape of the fabric at your shoulders and upper sleeve. Shoulder padding will add structure above the shoulders, and will visually add volume to the upper torso. The sleeve head is a thin layer of fabric around the shoulder seam where the shoulder meets the sleeve that helps prevent dimpling at the armhole, and provides a clean drape over the upper arms. Proper Cloth’s construction options offer different combinations of canvas, shoulder padding, and sleeve head.

Fully-Canvassed Constructions: Mercer vs. Hudson

Structured, Fully Canvassed / Mercer Jackets

The structured, fully canvassed construction is our most structured option. These jackets come fully canvassed with a medium-weight canvas, shoulder padding, and a medium-weight sleeve head. This is our most formal option and is most appropriate for suit jackets worn in a business environment.

Suits featuring ‘Mercer’ in the product name will by default include this structured, fully canvassed construction.

Soft, Fully Canvassed / Hudson Jackets

Soft, fully canvassed jackets also feature a medium-weight canvas, but differ from the structured style in that it has no shoulder padding, and a lightweight sleeve head. Though it is a more relaxed style, the Hudson is a versatile option, and recommended for sport coats worn in business-casual or casual environments. 

Jackets featuring ‘Hudson’ in the product name will by default include this soft, fully canvassed construction.

Half-Canvassed Constructions: Allen vs. Bedford

Structured, Half-Canvassed / Allen Jackets

The structured, half-canvassed construction is our go-to recommendation for a business suit jacket. It features a medium-weight half-canvassed construction, shoulder padding, and a medium-weight sleeve head. With canvas throughout most of the torso and padded shoulders, this option is reliable and ideal for your workhorse office garments.

Suits featuring ‘Allen’ in the product name will by default include this structured, half-canvased construction.

Soft, Half-Canvassed / Bedford Jackets

The soft, half-canvassed construction is our go-to recommendation for a sport coat. It is also half-canvassed, but using a lightweight canvas material, no shoulder padding, and a lightweight sleeve head. This option is ideal for business-casual and casual sportcoats, with its softer details and lighter weight.

Jackets featuring ‘Bedford’ in the product name will by default include this soft, half-canvased construction.

Uncanvassed Construction: Waverly Jackets

The uncavassed jacket construction is our most casual construction option. This style features no canvas, shoulder padding, or sleeve head. Due to its lack of structure, it’s best for jackets made from heavier casual fabrics that have a clean drape. It is more ideal for casual wear, and less suited to business environments.

Jackets featuring ‘Waverly’ in the product name will by default include this unstructured construction option.

The Overshirt: History, Fabric, and Style

The overshirt as a casual layering piece has had a surge in popularity in recent years. It can be worn as a mid layer, as light outerwear, and works well in a relaxed approach to tailored clothing. Here we’ll highlight the garment’s history and the fabric and design elements that make the perfect one. 

How to create a custom overshirt size.

Overshirt History

The origins of the overshirt can be traced back to late 19th-century workwear. At that time, men who worked manual labor jobs typically wore denim overalls for maximum protection the elements. They eventually modified their workwear to allow for more comfort and mobility, removing the bib and braces from the overalls (creating jeans) and adding heavyweight shirts over their first top layer to achieve the same level of protection up top as the denim provided on the bottom. These shirts featured large pockets for storage and easy access to items the men needed throughout the day. Thus the overshirt was born, and it became popular among working-class men for its durability and utility.

an overshirt
An overshirt in a chamois fabric.

Evolving Style

An overshirt is essentially a hybrid between a shirt and a jacket, and as such the design mixes elements of the two. It generally features a small- to medium-sized soft collar, such as our Soft Franklin Spread, Soft English Spread, Soft President Spread, or Soft Point collars. They do not have lapels, and they have the soft front plackets and button cuffs typically found on a dress shirt. Overshirts are usually designed with flap pockets for utility. Straight hems and larger buttons such as our coconut shell, natural corozo, or horn buttons are ideal to achieve a casual look. these shirt-jacket hybrids are less dressy than sport coats but should be worn similarly, as a top layer/outerwear because of their design and the weight of their fabrics.

Fabric

The fabrics used to make overshirts are thicker than those of dress shirts but less bulky than those of jackets. Dress shirt fabrics are typically of light or medium weight and are fine enough to be worn as a first layer against your skin. Overshirt fabrics, however, are heavier and include chamois, heavy flannels, corduroys, denims, and canvasses. You may also find them made from the same fabrics as sport coats, as they are analogous to each other in casual and more dressed-up looks.

How to Create a Custom Overshirt Size

Overshirts are meant to have a more casual and boxy fit than your business and formal dress shirts have. As such, we recommend you adjust your usual shirt size and save a separate size specifically for overshirts.

overshirt with straight hem

An overshirt with a Straight Hem.

Chest, Yoke, and Sleeve Width: Increase for Comfortable Layering

We recommend increasing the Chest Width, Sleeve Width, and Yoke Width of your regular dress shirt size when creating an overshirt size in order to accommodate a few pieces, such as a dress shirt, t-shirt, and/or sweater, layered underneath the overshirt.

Chest Width: Increase by about 1” (2” total circumference) from that of your dress shirt size. 

Sleeve Width: Increase by at least 0.5”-1” (1”-2” total circumference) from that of your dress shirt size. 

Yoke Width: Increase by about 0.5” to 0.7” from that of your dress shirt size. 

an overshirt

An overshirt in a chamois fabric.

Midsection and Bottom Width: A Straight, Boxy Fit is Ideal

Increasing the Midsection and Bottom Widths of your usual dress shirt size will help to achieve the loose, less tapered fit that works best for an overshirt. To specify the Bottom Width, click ‘Auto’ and manually change the measurement. The Midsection Width should be no more than 0.5″ smaller than the Bottom Width in order to avoid creating a curved silhouette. The goal is to achieve a roomy, straight fit from the chest to the hem by setting the Midsection and Bottom Widths relatively close to the Chest Width.

Straight Hem: Reduce the Shirt’s Back Length

Overshirts are typically worn untucked with a Straight Hem and the appropriate Shirt Back Length is all the more crucial to achieving the perfect fit. We recommend reducing the Back Length for shirts designed with Straight Hems because the lack of rise and gussets at the sides of the shirt makes Straight Hem shirts look and feel longer than Rounded Hem shirts when they’re untucked. The Back Length for a casual shirt with a Rounded Hem should be 1.5”-3” shorter than that of a traditional tucked-in dress shirt. If you’re basing your overshirt size on a casual untucked shirt size, however, it is best to set the Back Length 0.5” shorter than that of your typical untucked shirt with a Rounded Hem.

How Jacket Sleeve Opening Width Should Fit

How It Should Fit: Slight taper from elbow to cuff

When standing upright with your arms at rest, the jacket sleeves should be slim enough to look fitted at the wrist, or Sleeve Opening Width, but not so tight as to cause creasing, twisting, or pulling at the forearms and cuffs. The fit at the biceps and elbows should be generous enough to create the appearance of muscular arms that gradually taper down to the cuff.

Whether you prefer a modern slim fit or a traditional one, there should be enough room around the wrists to allow for range of motion when you bend your arms or reach forward. The jacket’s sleeve opening should not be so tight that it catches on your shirt cuff or prevents you from comfortably slipping your hands in and out of the sleeves.

perfect jacket sleeve opening width

Perfect Jacket Sleeve Opening Width: Cuffs have a clean, smooth, close (but not tight) fit around the wrists.

Jacket Sleeve Opening Width Too Small: Fabric bunching on the forearms

A sign that the jacket’s Sleeve Opening Width may be too small is fabric gathering along the forearm when your arms are at rest or when slightly bending them. In this case, the fabric hugs the forearm too closely. Without enough room to move the fabric stacks on itself, which can make it difficult to slip your shirt cuffs through the jacket’s cuffs. Even if the rest of the jacket fits well, the overall fit will still read as too tight if the sleeves can’t drape smoothly over the arms without getting caught.

Jacket Sleeve Opening Width Too Large: Baggy cuffs

A jacket Sleeve Opening Width that is too large will hang around the wrists and make one’s arms look unflatteringly small inside the sleeves. If there is no noticeable taper in the size of the sleeve from the bicep/elbow area down to the cuff, the Sleeve Opening Width is too wide. Even if you prefer a classic or more traditional fit, keep in mind that the sleeves should outline your arms rather than appear boxy.  

Jacket Sleeve Opening Width vs. Shirt Cuff Around Measurements: Why are they different?

You may notice that your jacket’s Sleeve Opening Width measurement is smaller than your shirt’s Cuff Around measurement. This is because the jacket Sleeve Opening Width is only half of the jacket’s cuff circumference, while the shirt Cuff Around measures the full circumference of the shirt cuff.

Local Tailoring: Can a tailor adjust my jacket Sleeve Opening Width?

Yes. A tailor can adjust the jacket Sleeve Opening Width to dial in your perfect fit. A 0.3”-0.5” adjustment goes a long way with this dimension so make sure not to over-adjust. We recommend minor tailoring adjustments here, about 0.5” maximum, to ensure the sleeve buttons’ functionality is not affected.

If you need a second opinion on how to adjust your tailored jacket size for a better fit or would like to request a remake for more dramatic changes to the Sleeve Opening Width, we recommend submitting a Fit Advice Request to get custom size recommendations for a potential remake. 

More information on how Proper Cloth garments can be altered by a tailor.