How Jacket Shoulder Slope Should Fit

How It Should Fit: Resting flat along neck and shoulders

A proper Shoulder Slope should match the natural angle of your shoulders. Whether you have broad, squared, rounded, or sloped shoulders, Proper Cloth offers six Shoulder Slope adjustments to meet most variations of shoulder shape and sizes:

  • Raised Shoulders +0.4″
  • Raised Shoulders +0.3″
  • Raised Shoulders +0.2″
  • Standard
  • Lowered Shoulders -0.2″
  • Lowered Shoulders -0.3″

The Shoulder Slope setting is set to Standard as a default on all sizes. This is something that will work for most people, as it has been optimized to work for most body types. If you notice wrinkles behind the collar or fabric creasing near the shoulder area, however, your jacket will need a Shoulder Slope adjustment.

the perfect jacket shoulder slope
The perfect jacket Shoulder Slope.

Perfect Jacket Shoulder Slope: No bunching behind collar or gathering under armpits

The goal is to achieve a Shoulder Slope that lays smoothly along the shoulders, upper chest, and sleeve head. There should be no wrinkles behind the collar or pull lines from the armpits towards the back of the neck.

a jacket that needs a sloping shoulder adjustment
A jacket that needs a Lowered Shoulder Slope adjustment.

Signs You Need the Lowered Shoulders Adjustment

Lines running from the armpits up towards the back of the jacket collar are a sure sign that you should lower the Shoulder Slope of your jacket. If you have sloped shoulders but are wearing a jacket with shoulders that are not sufficiently lowered to match your build, the garment may also appear to float above the edges of your shoulders. This may also present as a divot at the head of the jacket sleeve where it meets the shoulders. If you have the Shoulder Slope set to “Standard,” you will want to change it to one of the “Lowered” settings.

Choosing between Lowered Shoulders -0.2″ and Lowered Shoulders -0.3″ depends on how steep the slope of your shoulders is. Generally, the more extreme the slope of your shoulders the more you want to lower the shoulders of the jacket. Lowered Shoulders -0.2” will lower the shoulders of the jacket by 0.2″ from “Standard”. Lowered Shoulders -0.3” will lower the shoulders of the jacket by 0.3″ from “Standard”.

jacket needs a square shoulder slope adjustment
A jacket that needs a Raised Shoulder Slope adjustment.

Signs You Need the Raised Shoulders Adjustment

Rolls or bumps behind your jacket collar usually indicate that you should apply one of the Raised Shoulder Slope adjustments. If you have broad or square shoulders and are wearing a jacket that has too much slope or the Shoulder Slope is set to “Standard,” your shoulders may push the jacket up. Since the jacket’s shoulder angle is too steep for your shoulders, it can cause the fabric to float above the neck which manifests as wrinkles below the collar. If you have the Shoulder Slope at “Standard,” you will want to change it to one of the “Raised” Shoulder Slope settings.

Choosing between Raised Shoulders +0.2,” Raised Shoulders +0.3,” and Raised Shoulders +0.4” depends on how flat the angle of your shoulders is. Generally speaking, the more prominent the bump below the collar, the more drastic the change necessary. The Raised Shoulders +0.2” setting raises the ends of the shoulders by 0.2″ from “Standard”. Raised Shoulders +0.3” raises the ends of the shoulders of the jacket by 0.3″ from “Standard.” Raised Shoulders +0.4” raises the ends of the shoulders of the jacket by 0.4″ from “Standard.”

Jacket vs. Shirt Shoulder Slope: Should they be the same?

The Shoulder Slope setting of a jacket should not necessarily match the Shoulder Slope settings for a shirt. If a customer has a second or third-degree slope adjustment on their shirt size, however, this may be an indication that a single-degree adjustment is needed for the jacket size. In other words, a more extreme shirt slope adjustment suggests the possibility that a small jacket slope adjustment is needed.

Local Tailoring: Can a tailor adjust my Shoulder Slope?

A tailor can easily adjust the shoulder slope of a jacket that needs a Raised Shoulders adjustment. A Lowered Shoulders adjustment will require a remake, however, as this change affects the jacket’s structure noticeably. We recommend submitting a Fit Advice Request to get custom size recommendations for a potential remake.

How Jacket Bicep Width Should Fit

How It Should Fit: Close to the biceps, tapering slightly to the cuff

good jacket bicep fit

An example of a good jacket Bicep Width fit.

When standing upright with your arms at rest, the jacket sleeves should hug your biceps, but not so tight as to cause creasing, twisting, or pulling at the upper arms. The rest of the sleeves should taper gradually down to the cuff such that they do not “stack” or bunch at the elbows or forearms.

Whether you prefer a slim modern fit or a looser traditional one, there should be enough room in the upper sleeves to allow for good range of motion when you reach forward. An added benefit of having more room in the upper sleeves is that it creates the appearance of larger upper arms and tapers more naturally to the end of the cuff.

Bicep Width Too Small: Fabric gathers along the arms

jacket bicep width too small

An example of a jacket Bicep Width that is too small.

There are two common signs that the jacket’s Bicep Width may be too small: horizontal tension lines on the upper sleeves and fabric stacking at the elbows. A jacket Bicep Width that is too small can cause tightness at the armpits and eventually tears at the elbows because of the tension from the fabric hugging the body too closely without any room for movement. Even if the rest of the jacket fits well, the overall fit will appear too small and will likely be uncomfortable.

Gentlemen who prefer a fashion-forward style may want a very slim fit that highlights their biceps. Keep in mind that jackets are already meant to fit closer to your body without optimizing for mobility as much as a shirt does. If the fit is too slim it may look great when your arms are at rest but may feel tight when you reach forward. If this happens you should consider widening the Bicep Width a bit.

Bicep Width Too Large: Baggy upper sleeves

jacket bicep width too big

An example of a jacket Bicep Width that is too big.

A Bicep Width that is too large will hang around the arms and make one’s biceps look unflatteringly small inside the sleeves.  Even if you prefer a classic or more traditional fit, the sleeves should outline your arms rather than appear boxy or loose. There should be no folds of excess fabric around the biceps or elbows when your arms are at rest.

Jacket vs. Shirt Bicep Width Measurements: Why are they different?

You may notice that your jacket’s Bicep Width measurement is smaller than that of your shirts. That’s because shirts are designed to offer range of motion when you’re going about your daily activities, while jackets are designed to offer a trim appearance when your arms are at rest. Your jacket is meant to fit closer to your body and not necessarily provide a wide range of motion, whereas your shirt must leave more space around your body so you can move freely.

Your preference for either a slim or relaxed fit in shirts and jackets will determine just how much these measurements differ. Ultimately the two garments will fit and measure differently in the chest area because they’re designed for different purposes, but they will fit you the way their intended purpose requires.

Local Tailoring: Can a tailor adjust my jacket Bicep Width?

Yes. A tailor can widen the jacket Bicep Width by about 0.30” (0.60” in circumference) maximum, and tighten it up to .50” (1.00” in circumference) without affecting the jacket’s structure noticeably. A 0.30” adjustment goes a long way with this dimension so make sure not to over-adjust.

If you need a second opinion on how to adjust your tailored jacket size for a better fit or would like to request a remake for more dramatic changes to the Bicep Width, we recommend submitting a Fit Advice Request to get custom size recommendations for a potential remake.

More information on how Proper Cloth garments can be altered by a tailor.

Proper Cloth Jogger Pants: Style & Design

proper cloth casual and tailored joggers

Proper Cloth Ludlow and Waverly Custom Jogger Pants

Sporty, relaxed, and effortless. Our custom jogger pants feature premium construction and design details that strike the perfect balance between leisurely and smart. The following design elements will give you an easy, minimal look that will work with almost everything in your closet.

Drawstring Elastic Waistband

The 1.5″ tall elastic waistband goes all the way around the waist and has a button and zipper closure at the front. The drawstring ties at the front and features metal aglets (tips) for style and fray prevention.

Elastic Cuffs

A 1.5″ cuff with elastic all the way around for a comfortable fit.

Rear Pockets

Two jetted Chino Standard rear pockets keep detailing clean and minimal. Choose Mitered Flap rear pockets for a more utilitarian look.

Hip Pockets

Two Angled Side pockets provide casual function. Go for Side Seam pockets if you want an even more sleek look; for a workwear vibe, choose Fatigue pockets.

How to Order Jogger Pants

We have a couple of recommendations for adjusting your custom pant size before you order joggers. Find them here.

How to Create Your Custom Jogger Pant Size

model wears jogger pants

Our Waverly Jogger Pant

Our Ludlow and Waverly jogger pants are designed with a drawstring elastic waistband and elastic cuffs for a sporty, casual look. We think jogger-style pants look best with the elastic cuff sitting at or above the ankle or the top of the shoe, so the following adjustments are intended to help you achieve this look based on your starting measurements.

Decrease Inseam Length

The goal of this adjustment is to ensure the elastic cuff sits at or just above your ankle or the top of your shoe. Depending on where the cuff or hem of your regular casual pant/trouser inseam hits your foot or ankle, you should make adjustments as follows.

If your starting pant size has no break: Decrease the inseam length by about .5″-1″.

If your starting pant size has a small, or half, break: Decrease the inseam length by about 1″-2″.

If your starting pant size has a significant, or full, break: Decrease the inseam length by about 2″-3″.

If your starting pant size has negative break, or hits above the ankle: You won’t need adjustments, unless your inseam is particularly short. In this case, measure from the trouser hem to just above the ankle bone and increase the inseam length accordingly.

Alternatively, you can measure the inseam based on a pair of trousers you already own. Put on the trousers, fold up the hem until the bottom hits the ankle, then pin the fold in place. Take the trousers off, measure the height of the fold, and decrease the inseam length by that amount.

Decrease Leg Opening Width

Joggers look best, and the elastic cuff is most functional, when the leg tapers to a smaller opening at the ankle and the elastic cuff hugs the ankle closely. For most people* a leg opening width of about 7″ will work well; much bigger than this and you’ll have a loose elastic cuff.

*Alternatively, you can measure the leg opening width of a pair of trousers you already own. Enlist the help of a friend if you can:

  1. While you remain standing up straight, have a friend pinch the fabric of the trouser hem on either side of the ankle.
  2. Have them measure the front of the trouser hem to about a .25″ from each side of your ankle.
  3. Subtract that from your current trouser leg opening width. This new number is your elastic cuff leg opening width.


Must-Have Fabrics for Fall and Winter

Successful seasonal dressing hinges on fabric choice. When it comes to fall and winter, dense, heavy, warm fabrics are the cornerstones of weather-appropriate style.

Below you’ll find the details of the essential fall and winter fabrics you should have in your closet in rough weight order from lightest to heaviest.

Cotton Oxford

Cotton oxford cloth is a classic shirting fabric for more casual or sporty styles of dress shirts. It’s a bit thicker than what we’d consider “fine” dress shirt fabrics, with a weave that resembles a more pronounced pinpoint. While oxford cloth is a fabric you can wear year-round, its heft and versatility make a great fall and winter alternative to those thinner fabrics, like twills or broadcloths, that you might ordinarily pair with trousers or a suit. It also layers well with sweaters and vests.

oxford cloth fabric
A cotton oxford fabric.

Chambray & Denim

We’ve grouped these two together because they’re worn in very similar ways (and often confused with one another). They’re year-round workwear staples that layer well with other fabrics and come in heavier weights as well. You’ll most often find chambray in shirt form, woven with a plain weave, while denim is typically a “bottom weight” fabric, or a thick one used for bottoms (pants, shorts, etc.) and outerwear, in addition to shirts, woven with a twill weave. Chambray shirts are highly versatile and can be worn with suits to tone down their formality. Denim pants make a great base for cold-weather looks with lots of layers on top, whether they be sweaters and vests or shirts and sport coats.

chambray
A chambray fabric.
slub denim
A denim fabric.

Flannel

Cotton Flannel. Most often used for shirts, cotton flannel is a particularly soft woven fabric that’s been brushed to create a fuzzy texture. Some flannels are brushed on only one side, while others are brushed on both sides. The fuzziness the brushing creates increases the warmth of the fabric, as the fibers help the shirt retain more heat. Cotton flannel, especially with a plaid pattern, is a cold-weather classic.

A cotton flannel fabric.

Wool Flannel. Like cotton flannel, wool flannel is a woven fabric that’s been brushed to create a fuzzy texture. Wool flannel, however, is generally found in suiting or outerwear fabric rather than shirt fabric because it tends to be heavier. Wool flannel suiting fabric often maintains the smoothness of worsted wool, while wool flannels used for outerwear can be a bit more coarse and thick. The fuzziness the brushing creates increases the warmth of the fabric, as the fibers help the shirt retain more heat.

A wool flannel suiting fabric.

Chino, 5-Pocket, and Casual Pant Fabrics for Fall and Winter

The fabrics we make our fall and winter chinos, 5-pockets, and other casual pant styles from are distinct from year-round and spring/summer fabrics in their weight and texture. As you might expect, they tend to be heavier, and the textures range from pronounced versions of a typical twill to plush, waled corduroy. Like those of other seasons, fall and winter casual pant fabrics tend to be made from cotton. We consistently choose stretch cotton blends, such as 98% cotton/2% elastane, across all types of fall and winter casual pant fabrics for their comfort and resilience. 

Below you’ll find the details of several of our most popular fall and winter casual pant fabrics in rough weight order from lightest to heaviest.

Heavy Twill

Heavy cotton twill is a heftier version of a classic year-round chino fabric. It has more weight to it, as well as a drier hand and a stiffer structure, and it’s garment washed for the perfect broken-in look and feel from day one of wear. The diagonal twill weave is a bit more pronounced as well.

heavy twill chino fabric

A Japanese heavy cotton twill.

Peached Cotton

Peached cotton is a classic twill chino fabric but lightly brushed to give it extra warmth and softness. The ‘peach-fuzziness’ that results from the light brushing helps the fabric retain heat and the surface of the fabric shows the soft finish the peaching process creates.

peached cotton

An Italian peached cotton.

Brushed Cotton

Similarly to peached cotton, brushed cotton starts with a classic twill chino fabric. It is, however, brushed even more for an even softer finish, resulting in a quality akin to wool flannel. It is warm and comfortable for cold weather, with a luxuriously hefty weight. 

brushed cotton fabric

An Italian brushed cotton.

Terry Back

The name says it all. This particularly relaxed fabric has a smooth and soft outside that’s almost completely devoid of texture, while the inside (or back) features plush terry that wicks away moisture to keep you comfortable all day. It feels like sweatpants, but looks like a classic chino.

terry back fabric

A Japanese terry back.

Moleskin

With a satisfying heft and finish similar to chamois, cotton moleskin has been favored for centuries for its simultaneous hard-wearing durability and beautiful softness. It feels almost like suede, and its density makes it very warm—perfect for cold weather. It was originally a workwear staple because it could withstand rough activities.

moleskin

An English moleskin.

Corduroy

Corduroy has a super soft, velvety finish characterized by a uniquely textured weave called wale. Wale is the raised, tufted stripes that cover the entire surface of the fabric, giving it a distinct look and feel. Corduroy is dense and warm, which makes it great for fall and winter.

corduroy

An Italian corduroy.

See our full collection of chinos, 5-pockets, and casual pants here.

How Jacket Center Back Length Should Fit

How It Should Fit: Covering the seat

The perfect jacket Center Back Length should cover your rear and end at the base of your seat for a stylish, universally appropriate look. For a more modern look, a slightly shorter Center Back Length is acceptable. For a more traditional, classic look, the Center Back Length can end slightly below the seat. The goal is to create balanced proportions between the upper and lower halves of the body, and therefore between the jacket and trousers. For example, if your trousers have a significant break at the hem, your jacket will look better if it has a slightly longer Center Back Length.

Our rule of thumb holds that when standing upright with your arms relaxed at your sides, the jacket hem should hit mid-palm, or where the thumb meets the palm of the hand. To test if you have the appropriate length, try cupping the bottom of the jacket with your fingers.

suit from behind

An example of a good jacket Center Back Length.

Center Back Length Too Short: Sleeves are longer than the body of the jacket

One sign that the Center Back Length may be too short is if it does not reach your hands or is shorter than the jacket Sleeve Length. Even if the rest of the fit is correct, a noticeably short Center Back Length will make the overall fit appear as if it is too small.

Center Back Length Too Long: Falling past the hands or seat

An obvious sign that the Center Back Length is too long is if it falls past your hands or seat entirely. Even if the rest of the fit is correct, a Center Back Length that is too long will over-exaggerate your figure. The jacket will look sloppy, and it will appear that you’re wearing a jacket that doesn’t fit you. 

Local Tailoring: Can a tailor adjust my jacket Center Back Length?

The Center Back Length cannot be adjusted by a tailor, as there is not enough hem material for the jacket to be lengthened properly. In addition, shortening the jacket length can throw off the jacket’s overall balance by bringing the pockets and buttons too close to the bottom of the jacket, and shortening the length of the vent or vents.

If you need a second opinion on how to adjust your tailored jacket size for a better fit or would like to request a remake for more dramatic changes to the Center Back Length, we recommend submitting a Fit Advice Request to get custom size recommendations for a potential remake. 

More information on how Proper Cloth garments can be altered by a tailor.

How to Achieve the Perfect Polo Shirt Fit

The Proper Cloth Custom Polo Shirt

The Polo Shirt Fit: Relaxed and Not Too Slim

Since polo shirts will fit differently from your typical dress shirts, we recommend you adjust your usual shirt size and save a separate size specifically for polo shirts. 

Polo shirts are made from stretchy knit fabrics and look best with a little more ease in the fit than woven dress shirts. The relationship between the Midsection and Bottom Widths of your polo shirt is the most important factor in achieving the perfect polo fit. The Midsection shouldn’t be too much smaller than the Bottom Width in order to avoid creating a bell-shaped, curved silhouette. This is particularly important for a polo shirt you intend to wear untucked. Since this shirt is meant to be worn casually, it should not hug your torso like a slim fit dress shirt. If you’ve already perfected your Camp shirt size, you can base the Midsection and Bottom Widths of your polo shirt size off of this; they should fit slightly slimmer than the Midsection and Bottom Widths of your Camp shirt. 

Slimmer Short Sleeves

The sleeves of a short sleeve polo shirt should be a bit slimmer than those of your usual untucked short sleeve shirt. They should hug the bicep a little more closely for a more athletic look. If you choose the Polo Cuff option for your short sleeve Polo Shirt sleeve design, it will automatically make the Short Sleeve Opening Width measure 0.7” narrower than the specified Short Sleeve Opening Width in your size profile. This gives the end of the short sleeve a closer fit and the recognizable ‘cinching’ of traditional polo shirt short sleeves.

Polo Hem: Adds 1″ to Shirt Back Length

The Polo Hem features a straight front hem, as well as a straight back hem that is 1″ longer. Simply put, if your saved size features a 30” Shirt Back Length, your Polo Hem design shirt would measure 31” in the Shirt Back Length.

The TechKnit Mask: Version Specifications

Since we launched our TechKnit Mask we’ve made several improvements to its design. You’ll note that different versions of the mask are available on our site, identifiable by the “v1.2,” for example, in the product name. Here you’ll find an explanation of the differences among them and the specifications of each.

Version 1 (v1.0)

This was the first batch of TechKnit masks we produced. These masks feature an over-the-ear elastic band design with adjuster pieces and sewn-in filter.

techknit mask v1.1 dimensions

TechKnit Mask v1.0 and v1.1 Dimensions

Version 1.1 (v1.1E and v1.1H)

This version of the TechKnit Mask is identical in its dimensions to Version 1.0, but we’ve reduced bulk at the outer edges to improve the fit along the sides of the mask. We also added an over-the-head elastic band option.

Version 1.2 (v1.2E and v1.2H)

We heard your feedback on v1.0 and v1.1. For v1.2 we increased the size and updated shape of the masks to improve fit and better follow the contours of the face. The new exterior fabric is 100% Italian performance jersey knit, and a new sewn-in filter boasts BFE ≥99% and PFE ≥95% certification. These masks are available with around-the-ear and over-the-head elastic bands.

chart showing dimensions of techknit mask v1.2

TechKnit Mask v1.2 Dimensions

Proper Cloth Drawstring Shorts


drawstring shorts inseams

Proper Cloth shorts are available in three inseam lengths: 5″, 7″, and 9″

Our first-ever shorts feature an elastic drawstring waistband and three inseam lengths in sizes XXS (26) to 3XL (40). 

The inseam measures the distance from the crotch point (where short or trouser legs meet) to the bottom of the leg along the inner seam of the leg. We tested numerous inseam lengths and found that 5”, 7”, and 9” were the best and most flattering for most guys. We wanted to provide options that as many guys as possible would appreciate, and that would work well whether you’re a size XXS or a 3XL. 

For full specifications for each size and inseam, please refer to the size chart below (all measurements in inches):

shorts size chart

Proper Cloth Shorts Size Chart


Pant Front Options: No Pleats, Single Pleats & Double Pleats

trouser front options illustration

Pant Front Options, Left to Right: No Pleats, Single Pleats, Double Pleats

We offer three trouser front options: No Pleats, Single Pleats, and Double Pleats. Each has a different use case, in terms of both fit and style. This page provides an overview of the three trouser front options.

No Pleats

Pants without pleats (also known as “Flat Front” pants) have a clean, form-fitting look. If you like your trousers to be particularly slim or skinny, this is the option for you, but you need not have a slim or skinny fit in order to choose No Pleats for your trousers; it works well for all sizes. No Pleats is the most popular option for pants due to its modern look and ease of wear and care, as it does not necessarily require a crease down the front of the trouser legs.

single pleat trouser detail

A close-up of the Single Pleat pant front option.

Single Pleats

Pleating is a folding technique used to gather fabric and secure it. In the case of trousers, pleats allow more room to be hidden in the lap area for increased comfort. Single Pleats are a subtle way to add that extra comfort. With one pleat on each side of the front of the trousers, they visually break up the expanse of cloth across the lap, and can give your trousers a flattering crease line from waistband to cuff. Though these benefits are particularly great for larger men, you need not be a larger man to enjoy Single Pleats. If you like a roomier fit, or simply like the look of pleats, they make a subtle statement for anyone, no matter their size or shape.

double pleat trouser detail

A close-up of the Double Pleat pant front option.

Double Pleats

As the name suggests, the Double Pleats option adds two pleats to each side of the front of the trousers. Double Pleats are a more dramatic way to add extra comfort to your trousers, as they draw more attention to the lap area in addition to adding more room there. Just like Single Pleats, Double Pleats visually break up the expanse of cloth across the lap, and give your trousers a flattering crease line from waistband to cuff. Once again, Double Pleats are great for larger men, but anyone who enjoys the look of them or a roomier fit can add them to their trousers.

We recommend creating a pleated pant size that is separate from your ‘no pleats’ pant size.

If you’ve ordered a non-pleated pant with us in the past and are happy with the fit, we recommend creating separate pant sizes before ordering 1-pleat and 2-pleat pants. 

Generally, a minor adjustment to the Hip Width is all you need to achieve the same fit of your non-pleated pants.

Tailored Dress Pants

  • For Single-Pleat pants, we recommend adding 0.8″ to the Hip Width
  • For Double-Pleat pants, we recommend adding 1.3″ to the Hip Width

Casual Pants/Chinos

  • For Single-Pleat pants, we recommend adding 0.4″ to the Hip Width
  • For Double-Pleat pants, we recommend adding 0.8″ to the Hip Width

How to create a pleated pant size.

How to Create a Pleated Pant Size

trouser pleats

Single Pleat Trousers

Pleated pants are constructed differently from non-pleated trousers and so they require an entirely new sewing pattern. The pleats are open when the garment measurements are taken, but they are closed when the trousers are cut and sewn, so we must account for this change in your size. You’ll need to create a special size in order to order pleated pants, and it only takes a minute to do—follow the instructions below.

How to Create a Pleated Pant Size from an Existing No-Pleat Size

  1. Log into your Proper Cloth Account and go to your Saved Pants Sizes. Choose the existing No Pleat pant size you’d like to start with as a base for your pleated pant size.
  2. Make the appropriate adjustment (increase) to the Hip Width (see recommendations below) based on the product type.
    • Tailored Dress Pants
      • +0.8″ Hip Width for Single Pleat
      • +1.3″ Hip Width for Double Pleat
    • Casual Pants/Chinos
      • +0.4″ Hip Width for Single Pleat
      • +0.8″ Hip Width for Double Pleat
  3. After making the recommended adjustments, check the Size Compatibility on the right side of the window.
  4. Click the black SAVE CHANGES/SAVE AS button and give the size a name to save it as a new trouser size. We recommend including 1-pleat or 2-pleat in the name for clarity.
creating pleats

Consult the right-hand side of the pant size profile for Size Compatibility information.

Compatibility Issues

When updating your saved size to accommodate pleats, be sure to note the ‘Size Compatibility’ displayed in the size profile. Certain dimensions may be out of range for certain styles of pant including no pleat, 1-pleat, or 2-pleat pant styles.

While the guidelines above for Hip Width adjustments generally provide optimal results for most customer sizes, consider making minor changes to Hip and Thigh Width as needed to ensure Size Compatibility with your desired trouser style.

saving pleat size profile

Pleated Pants : Function, Design & Style

Like many things in fashion, pleats come in and out of style. If you’ve been paying attention to mainstream style since the 2000s, you might have noticed that pleats were missing from the main stage.

double pleat trouser


While many think of pleated pants as an aesthetic embodiment of the powerful yet nonchalant look of the ’80s and ’90s, their original and enduring purpose was, and is, comfort.

What Are Pleats?

Pleats are small folds of fabric on the lap of the trousers that were originally added to provide extra room in the garment. They visually break up the expanse of cloth across the lap (a trick particularly beneficial to larger men), and can give your trousers a flattering crease line from waist to cuff. Pleated pants tend to maintain a sharp crease better than No Pleat (Flat Front) trousers, too. 

Design Tips for Pleated Trousers

  • A cuffed leg opening on a pleated trouser makes for a classic look. The cuff also ensures a very clean drape down the leg.
  • Belt loops will give pleated trousers a traditional, practical vibe, and are particularly helpful if you’re a larger guy who feels the need to wear a belt.
  • Side tab adjusters will give pleated trousers a clean and more sartorial vibe.

Styling: Tips for Wearing Pleats

The possibilities are almost endless, but here are just a few hints to get you inspired.

  • Pair pleated trousers with workwear-inspired pieces—shirts with flap pockets or trucker jackets, for example—to play into the enduring practicality they represent.
  • A Camp shirt will give them a laidback, retro vibe.
  • Wear a white t-shirt and white sneakers with a pair of pleated trousers for a thoughtful casual look.
  • Give your pleated trousers a good iron before wearing, making sure to get the front crease nice and crisp.

How to Order Yours

Before you can order trousers with Single or Double Pleats, you must have a trouser size that supports pleats. How to Order Pleated Trousers.

When Should I Start Shopping for My Wedding?

black tie wedding

Plan ahead to look your best on the Big Day.

First of all, congratulations on taking the leap. We’re excited for you and your partner to tie the knot, and that you want to include us in your big day. 

We know that ordering wedding garments can be daunting and that they’re often an investment, so we’re here to make the process as stress-free as possible—and to help you avoid a last-minute scramble.

When should I order my shirt?

At Proper Cloth, shirts take about 2 weeks total to be cut, sewn, and delivered to your door. Current delivery times and FAQs related to shipping. Upon receipt, the shirt will need a wash or two (wash cold, hang dry) to remove the shrinkage allowance we add during production. 

In the event that your first shirt isn’t 100% perfect, we offer 2 complimentary remakes to get it just right. The remakes can adjust sizing, fabric, and/or style details. That being said, each remake takes the same 2 weeks to produce and deliver since we make a whole new shirt each time. In order to allow ample time for potential remakes, and to ensure you’re completely happy with your fit, we recommend ordering your shirt 2-3 months before your wedding. This cushion will help you avoid getting put into a tight spot if any unforeseen events or delays occur.

When should I order my suit/tuxedo?

For all suiting—including full suits and tuxedos, jackets, and trousers—we quote about 4 weeks from order placement to delivery. Current delivery times and FAQs related to shipping. You are guaranteed 2 complimentary remakes of your suit, so it is best to order it 4-5 months in advance. Again, this gives both you and us cushion time to ensure every detail is taken care of and you look and feel your best.

There are 2 ways to go about making adjustments to your tailored garments, should they need adjusting. The first, for suiting needing only subtle adjustments, is for you to take the suit to your local tailor. We will reimburse you up to $75 for the jacket tailoring and $50 for the trousers. This is a very efficient route to go if possible.

The second option, for more dramatic adjustments, is for us to remake the suit from scratch. Starting again means there will be another 4-5 week lead time for cutting, sewing, and delivery. In order to accommodate the potential for 2 full remakes, 3 months ahead is the latest we recommend ordering your suit or tuxedo.

I need ties, tuxedo studs, and cuff links. When should I order them?

Our stocked accessories are generally delivered within 7-10 business days of order placement. We recommend ordering these items 2-3 weeks ahead of time so you’re prepared in the (albeit unlikely) event that your order needs to be replaced.

How can I make sure my shirt is equipped for tuxedo studs?

When you get to the “Front/Placket” section of our Design-A-Shirt tool, any of the placket options with the word “Tuxedo” in the name are set up for studs. Choose one of those and the top 4 buttons on the shirt will be attached to a strip of fabric that can be removed to allow for stud use. 

Tips for designing the perfect custom shirt for a wedding.

Or–shop our gallery of pre-designed formalwear shirts here.

As always, feel free to reach out to our customer experience team for styling advice, sizing help, and any other questions pertaining to future orders or those in process. We’ll do everything we can to make sure this part of your wedding goes smoothly. 

How Jacket Midsection Width Should Fit

How It Should Fit: Gently hugging your torso

A well–tailored jacket should lightly hug your midsection and follow the curve of your back in a smooth, uninterrupted drape. There should be no pulling or bunching when you button the jacket and your arms are at rest. 

Whether you prefer a classic, slim, or very slim fit, the midsection should generally fit closer to the body than the chest and shoulders. The goal is to create the appearance of a broader upper body that gradually tapers down to flatter the waistline without restricting your movement or pulling the fabric.

perfect jacket fit

Perfect Midsection Width: Hugging the curve of the body with a gentle taper.

Midsection Width Too Small: X-shaped pulling at the top button

One sign that the Midsection Width is too small is the gathering of fabric or X-shaped lines pulling from the top button. When you button up the jacket and relax your arms at your sides, there should be no indication of tension across the torso.

A tight Chest Width can also contribute to tension lines at the midsection. Because the Chest and Midsection Widths are connected, it is important to consider correcting both of these measurements when assessing the midsection fit.

Gentlemen who prefer a fashion-forward style may want a very slim fit at the waist. Keep in mind that even with a slimmer fit, the fabric shouldn’t strain across the torso. There should be a sleek and uniformly smooth taper at the waist with enough room between your body and the jacket to allow one hand to fit between them.

jacket midsection width too small

Midsection Width Too Small: Tension lines pulling from the top button.

Midsection Width Too Large: Baggy fit at the waist

A Midsection Width that is too large will hang around the torso and show little to no definition of the waist. Even for gentlemen who prefer a classic or more traditional fit, the silhouette of the jacket should follow your body and taper at the waist rather than form a boxy shape that hangs straight down from the armpit. There should be no folds of excess fabric around the midsection (front, sides, and back) when the top button of the jacket is buttoned.

jacket midsection width too large

Midsection Width Too Large: Excess fabric around the waist.

Jacket vs. Shirt Midsection Width Measurements: Should they be similar?

It is common for your jacket’s Midsection Width to be the same as or close to your shirt’s Midsection Width, especially if your shirt’s Midsection Width has been properly dialed in. This is not always guaranteed, however, as the relationship between the two measurements depends on your fit preference for both garments.

In general, shirts are designed to offer range of motion while jackets are designed to offer a trim appearance when standing with your arms at rest. If you like a slim fit for both your shirts and jackets, the Midsection Widths of each are likely to be very close in measurement. Gentlemen who prefer a relaxed shirt fit compared to their jacket fit, however, may find that the jacket’s Midsection Width measures smaller than the shirt’s Midsection Width. Conversely, if you prefer a slim or very slim midsection fit for the shirt but a classic fit for the jacket midsection, you may find that the jacket’s Midsection Width measures the same or .5”-1” larger than the shirt’s Midsection Width.

Local Tailoring: Can a tailor adjust my jacket’s Midsection Width?

Yes. A tailor can increase the jacket’s Midsection Width by about 0.4” (0.8” in circumference), or reduce it up to 1” (2” in circumference) without noticeably affecting the jacket’s structure. For alterations requiring more dramatic changes to the fit, we recommend submitting a Fit Advice Request to get custom size recommendations for a potential remake. 

More information on how Proper Cloth garments can be altered by a tailor.

How Jacket Chest Width Should Fit

How It Should Fit: The jacket lapels should rest flat against your chest

When you button the top button of your jacket, the lapels should rest smoothly and unbent on your chest. There should be no folds of excess fabric, tension lines, or wrinkles in either the front or back of the jacket where the chest meets the armhole. 

The Proper Cloth rule of thumb holds that there should be enough room between your torso and the jacket to allow one hand to fit between them. The goal is to achieve a clean, polished appearance while having fair range of motion.

perfect jacket fit

Perfect Chest Width: Flat lapel, trim silhouette, no tension at the top button.

Chest Width Too Small: Broken or bent lapels

One sign that the jacket’s Chest Width may be too small is if the lapels bend out noticeably at the chest area. This bending is referred to as “breaking.” If the lapels hug the body too closely, the tension between the neck area and the buttoned top button of the jacket will cause the lapel to “break”. The fit will appear shrunken and uncomfortable.

jacket chest width too tight

Chest Width Too Small: Bending lapels and pulling at the top button.

Another sign is X-shaped tension lines from the buttoned top button out towards the sides of the torso. If you see these lines, you should also consider increasing the Midsection Width. Because the Chest and Midsection Widths are connected, they must often be considered simultaneously in order to correct the fit in the torso.

Chest Width Too Large: Excess fabric at the armpits

The Chest Width is too large if the jacket appears particularly full near the armpits. You’ll see excess fabric folding where the chest meets the armholes in both the front and back of the jacket. 

jacket chest width too large

Chest Width Too Large: Excess fabric at the sides of the chest.

Whether you prefer a slim or relaxed jacket fit, the jacket torso should highlight your silhouette in a ‘V’ shape: wider at the shoulders, gradually tapering down to the midsection. Your body should be complemented by the fit with clean lines around the edges of the garment and few wrinkles on the fabric.

Jacket vs. Shirt Chest Width Measurements: Why are they different?

You may notice that your jacket’s Chest Width measurement is smaller than that of your shirts. That’s because shirts are designed to offer range of motion when you’re going about your daily activities, while jackets are designed to offer a trim appearance when your arms are at rest. Your jacket is meant to fit closer to your body and not necessarily provide wide range of motion, whereas your shirt must leave more space around your body so you can move freely.

Your preference for either a slim or relaxed fit in shirts and jackets will determine just how much these measurements differ. Ultimately the two garments will fit and measure differently in the chest area because they’re designed for different purposes, but they will fit you the way their intended purpose requires.

Local Tailoring: Can a tailor adjust my jacket chest width?

Yes. A tailor can increase the jacket Chest Width by about 0.4” (0.8” in circumference), and reduce it up to 1” (2” in circumference) without affecting the jacket’s structure noticeably. For alterations requiring more dramatic changes to the fit, we recommend submitting a Fit Advice Request to get custom size recommendations for a potential remake. 

More information on how Proper Cloth garments can be altered by a tailor.

How Jacket Shoulder Width Should Fit

How It Should Fit: Slightly past your shoulder bones

The shoulders of a jacket should highlight your natural silhouette with smooth, uninterrupted lines and a clean drape throughout the upper chest, upper sleeves, sleeve head, and shoulders. Whether you prefer a modern slim fit or a traditional one, the shoulder seams of the jacket should end slightly past your shoulder bones without pushing past the top of the arm. 

Correct Jacket Shoulder Width

Perfect Shoulder Fit: Sharp, polished intersection of shoulders and sleeve head.

The jacket Shoulder Width should be slightly wider than your shoulder bones by approximately .5” (.25” on each side). The shoulder seams should meet the top of the sleeves without wrinkles, divots, tension, or pulling. The goal is to create a silhouette that tapers gradually from the upper body down to the midsection, all while ensuring the jacket drapes cleanly in the torso and sleeves.

Shoulder Width Too Narrow: Fabric pulled tight across upper arms

An obvious sign that the jacket Shoulder Width is too narrow is fabric pulled tight on the upper arms. The short length of the shoulders causes the sleeve heads to be pulled too close to the body which creates tension and distorts the shoulder fit. Even if the rest of the jacket fits well, this will likely be uncomfortable—it’s always worth paying attention to how the different areas of the jacket feel to get a sense of how they are fitting. Increasing the Shoulder Width will relax this tension and allow the sleeves to drape properly and comfortably.

Shoulder Width Too Wide: Dimpling at sleeve head

If the Shoulder Width is too wide, the shoulders will be exaggerated and sag noticeably. You’ll see wrinkles that run from under the jacket lapel to the shoulder edge and a bulge of excess fabric that creates a dimple at the top of the sleeves. Even if the rest of the jacket fits well, an oversized shoulder fit will make the jacket look sloppy, as if it’s a size too large. Decreasing the Shoulder Width will flatter you and clean up the drape of the sleeve.

Local Tailoring: Can a tailor adjust my jacket’s shoulders?

A tailor cannot easily alter the shoulders of a jacket as it often requires changes to numerous other parts of the garment. Adjustments to the jacket’s Chest Width, Sleeve Width, or center back seam can potentially correct some of the aforementioned issues, however, it’s best to consult us for recommendations. If your jacket is in noticeable need of Shoulder Width adjustments, we recommend submitting a Fit Advice Request to get custom size recommendations for a potential remake.

How Jacket Sleeve Length Should Fit

How It Should Fit: Above your wrists, never past the heel of your palm

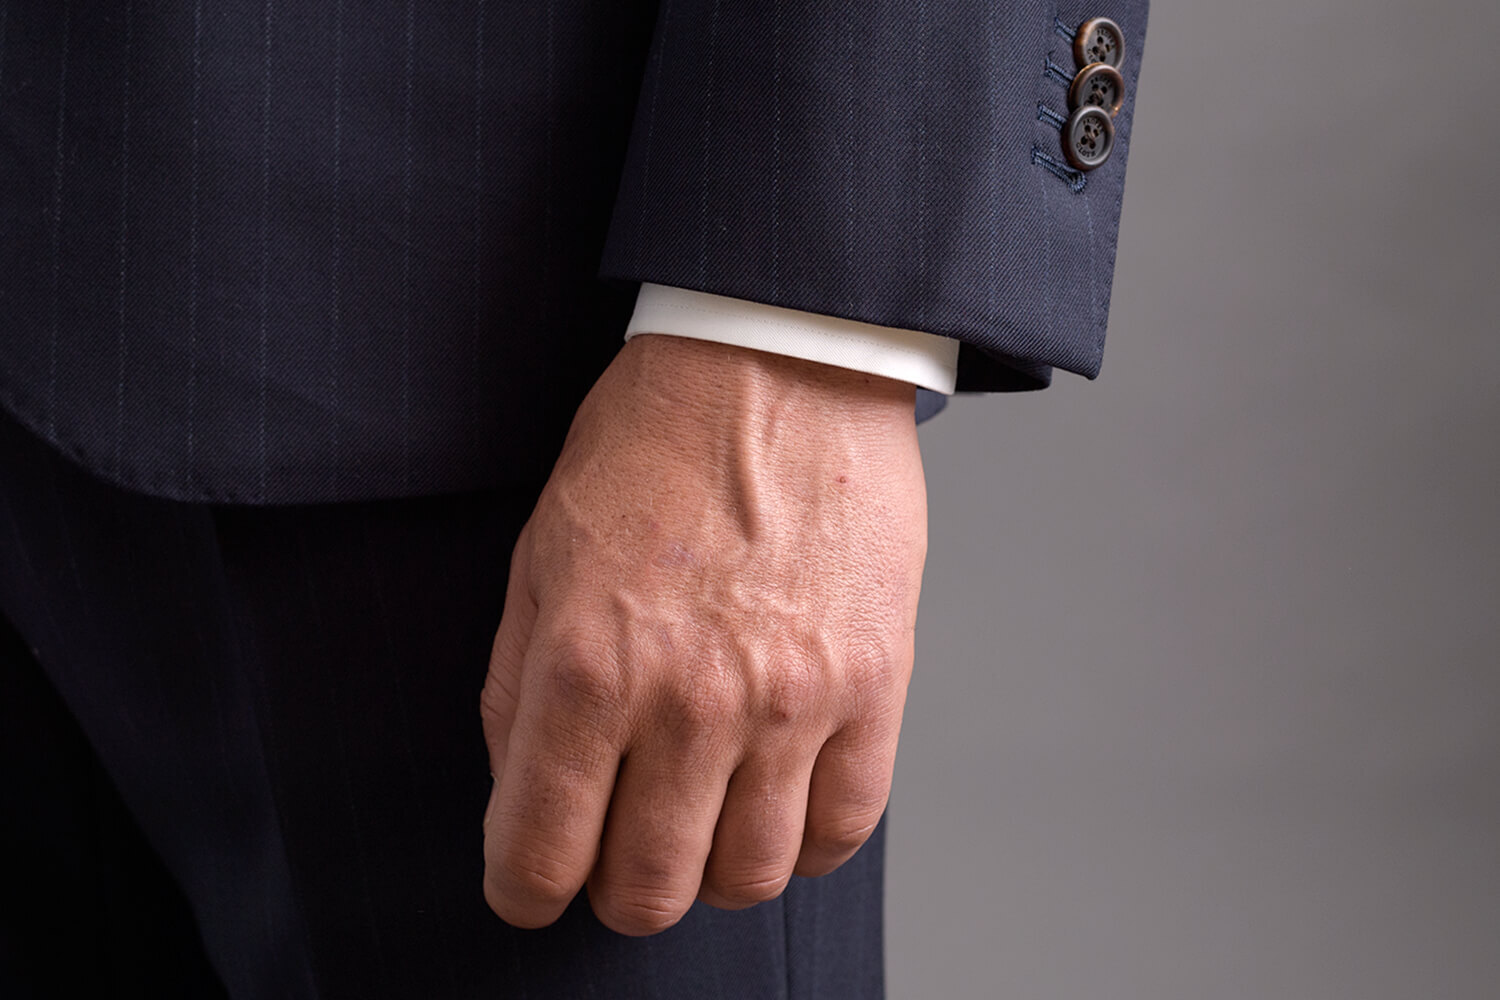
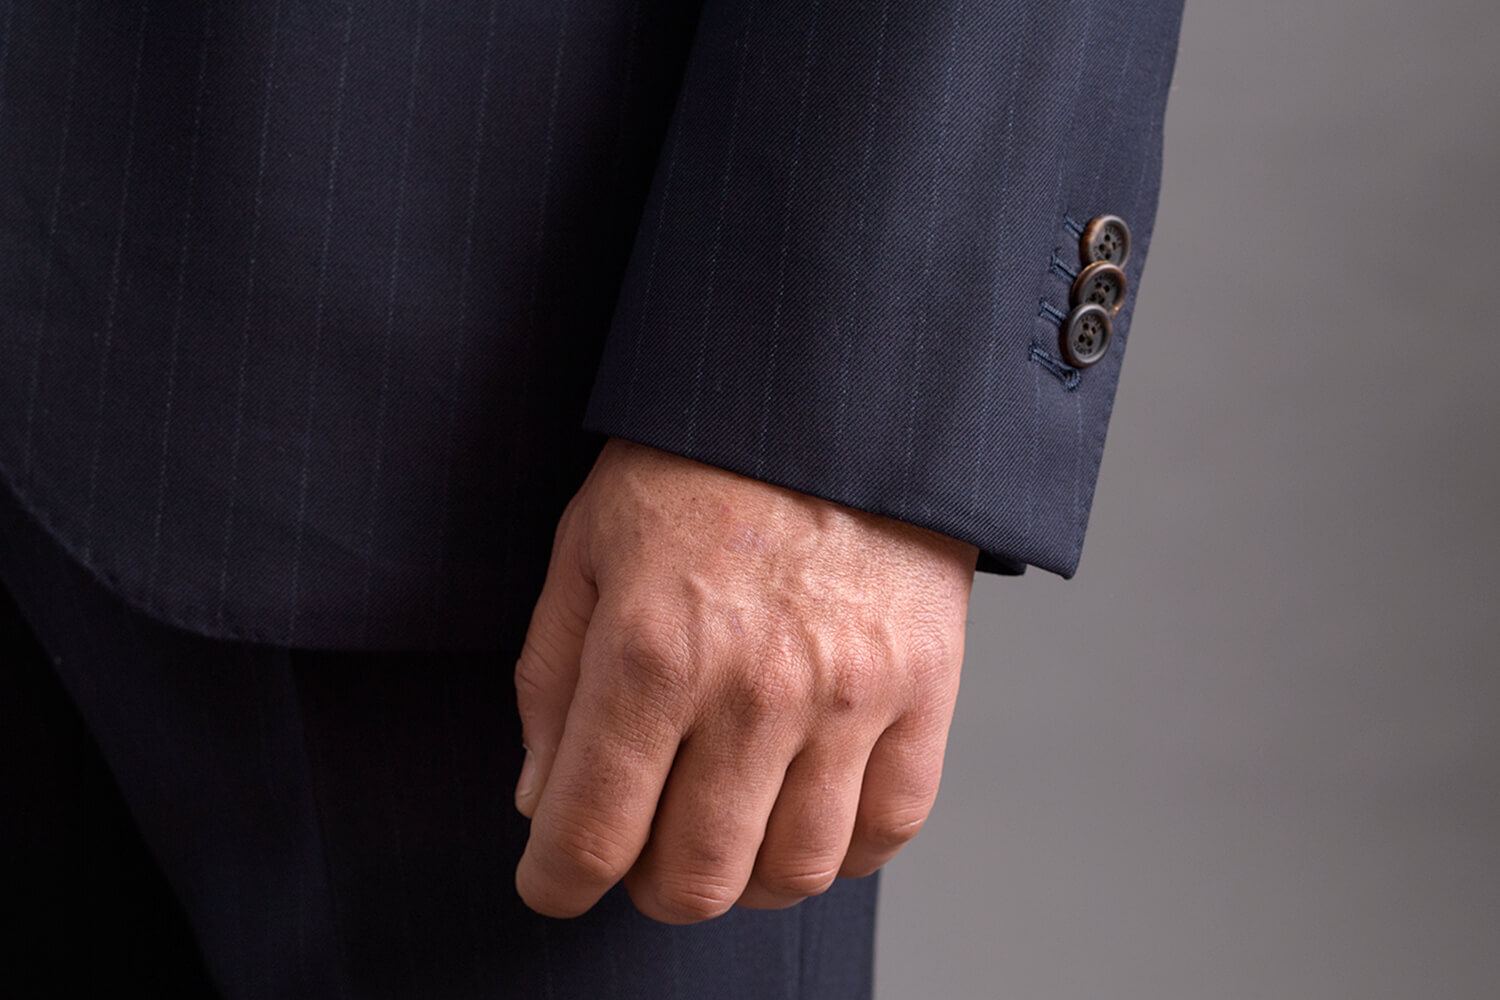
The Proper Cloth rule of thumb holds that a jacket sleeve should expose 0.25”- 0.50” of your dress shirt cuff for a stylish, universally appropriate look. If your personal style is more on the traditional or classic side or you’re wearing the jacket in a more conservative business setting, 0.125” or no shirt cuff at all is suitable. If your personal style or the setting is more fashion–forward/trendy, 0.5”- 0.75” of shirt cuff is generally accepted. The jacket sleeve length should never pass the heel of your palm regardless of how much shirt cuff you choose to show.

good jacket sleeve length

Jacket sleeve showing about 0.5″ of shirt cuff. This is considered almost universally appropriate.

Generally speaking, showing .25”-.50” of your shirt cuff strikes the perfect balance between trendy and classic. A fair amount of exposed shirt cuff offers a contrast to the overall style without looking too bold.

jacket sleeve too short

Jacket sleeve too short, showing more than 1″ of shirt cuff.

With your arms relaxed at your sides, you should not see more than 1.00” of the shirt sleeve cuff. Fashion–forward gentlemen who want to show more cuff can use the cuff buttons as a reference point. The jacket’s sleeves should be long enough to completely cover the buttons of the shirt cuff. 

jacket sleeve too long

Jacket sleeve too long, falling past the shirt cuff.

If the jacket sleeves cover your palms when your arms are relaxed at your sides, you will want to decrease the jacket sleeve length. Gentlemen who have a more classic style or want to show little to no cuff can use the end of the shirt sleeve as reference. The jacket sleeves should be either the same length as the shirt sleeve or 0.125” shorter.

Local Tailoring: Can a tailor adjust my jacket sleeve length?

Having a local tailor alter the sleeve length of your Proper Cloth jacket is simple. Our jacket sleeves can be increased by up to 0.75” or decreased by up to 0.5” by a local tailor. Because our garments come with functioning buttons on the sleeve, lengthening or decreasing the sleeves by any more than this is not recommended. For alterations requiring more dramatic changes to the fit, we recommend submitting a Fit Advice Request.

jacket vs shirt sleeve length measurement

Jacket Sleeve vs. Shirt Sleeve Length Measurement

Jacket Sleeve vs. Shirt Sleeve Measurements: Why are they different?

We take the jacket and shirt sleeve measurements from different parts of the garments. For this reason, your jacket’s sleeve length will be much shorter than your shirt’s sleeve length. The Jacket Sleeve Length is measured from the top of the sleeve, where the armhole meets the shoulder seam, down to the end of the jacket sleeve. The Shirt Sleeve Length is taken from the center back of the shoulder, at the base of the neck just under the shirt collar, extending to the shoulder seam and down the arm to the end of the sleeve cuff. Since the jacket sleeve measurement does not include the center back of the shoulder to end of shoulder, it will be always shorter than the shirt sleeve length measurement.

Different Sleeve Lengths: What if one of my arms is longer/shorter than the other?

If your arms are not the same length or your shoulders are a bit uneven, we can set two different sleeve lengths for your jacket size. 

how to tune jacket sleeve length

You can make your jacket sleeve lengths different in your account.

Simply click the ‘Uniform’ button in your Saved Custom Jacket Size. This will display the expanded options and allow you to adjust right and left jacket sleeve lengths separately.

How to Wear The Everyday Mask

Our guide to wearing a face mask with overhead straps.

  1. Adjust the nose bridge wire to have a round curve that will fit around your nose.
  2. Hold the mask hanging down by its two straps.
  3. Hook the mask under your chin and pull the straps over your head.
  4. Release the lower strap at the back of your neck.
  5. Position the top strap at the back of the top of the head.
  6. Ensure the mask is snug under your chin and against your cheeks.
  7. Adjust the nose bridge wire to seal around your nose.


Introducing the Very Tailored Upper Sleeve Fit

The Very Tailored Upper Sleeve Fit is a new Upper Sleeve Fit option that can improve the fit of your shirts. If you’re looking to achieve a slimmer bicep fit (Sleeve Width) without compromising on Chest Width, the Very Tailored Upper Sleeve Fit is your answer.

Very Tailored Armpit Fit

The effect of the Very Tailored Upper Sleeve Fit on the fit of a dress shirt.

Reasons to Switch to Very Tailored Upper Sleeve Fit

Consider switching your Upper Sleeve Fit to the Very Tailored option for these reasons:

  • Your goal is to create a shirt that looks particularly clean and tailored when standing with your arms at your sides and you’re willing to tolerate a bit less range of motion, or a bit of tightness when reaching forward or up over your head.
  • You’ve been using the Tailored option up to this point, and have been unable to get the sleeves as slim as you’d like. The Very Tailored option will enable you to reduce the Sleeve Width to a smaller measurement than you had before.

How does Very Tailored Upper Sleeve Fit work?

The Very Tailored Upper Sleeve Fit option attaches the sleeves to the body of the shirt at an even more downward angle than the Tailored Upper Sleeve Fit. This changes the shape of the armhole, making it more oval-shaped than the armhole of the Tailored option and lowering the armpit position. Fabric is essentially removed from the front and back of the sleeve where it attaches to the shirt, for a cleaner-looking fit when standing with your arms at your sides.

Tips for Switching from Tailored to Very Tailored Upper Sleeve Fit

Since switching from Tailored to Very Tailored will lower the position of the bottom of the armpit, we suggest making the following changes (at a minimum) to avoid making the shirt feel looser than before:

Decrease Sleeve Width by 0.2-0.3″. Since the Sleeve Width (specified as the width of the arm 1” below the armpit) will now be measured at a point lower on the arm than before, leaving the Sleeve Width the same when switching to Very Tailored will make the sleeves seem looser. Decreasing the Sleeve Width by 0.2-0.3” will help balance that out.

Decrease Chest Width by 0.2″. Since the Chest Width (specified as the width of the shirt across the bottom of the armpits) will now be measured at a point lower on the body than before, leaving the Chest Width the same when switching to Very Tailored will make the chest seem looser. This is particularly the case if your Midsection Width is much narrower than your Chest Width. Decreasing the Chest Width by 0.2-0.3” will help balance that out.