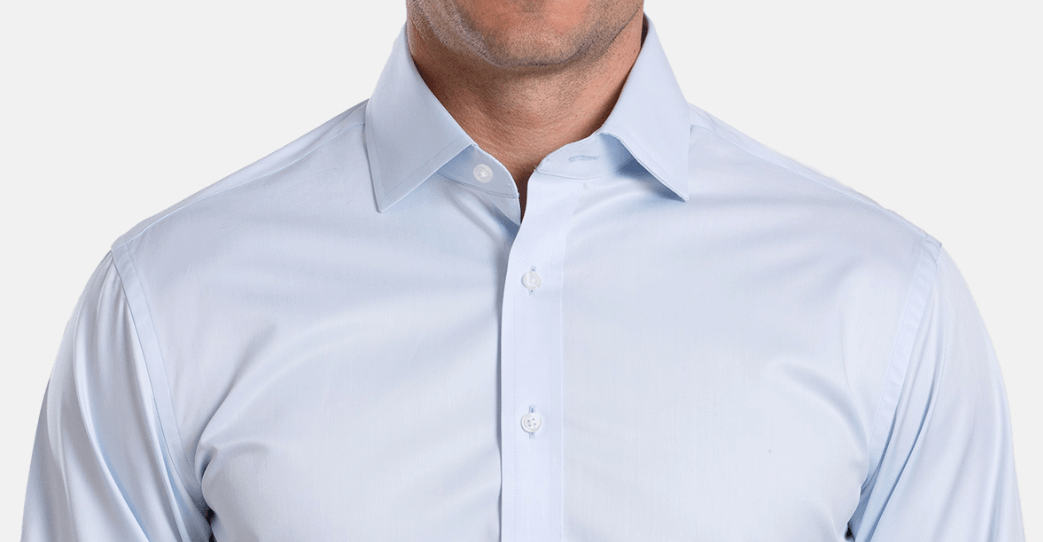
Proper Cloth offers the ability to adjust how high or low you’d like the first button below the shirt collar to be placed, but it may not be obvious why you would like to adjust this part of your shirt. Typically, our standard placement is just a shade below the “industry average,” to allow for a better look with your collar undone and the first placket button fastened.
Per the opening dialogue of season one, episode one of Seinfeld:
JERRY: Seems to me, that button is in the worst possible spot. [talking about George’s shirt] The second button literally makes or breaks the shirt, look at it: it’s too high! It’s in no-man’s-land, you look like you live with your mother.
Standard Top Button Placement
By default, we place the top button such that its center is 2 7/8″ below the bottom of the collar band.
Spacing Between 2nd, 3rd, 4th, etc. Buttons
Button Spacing refers to the distance between the buttons on the shirt front measured from button center to button center. This is different from the distance between the collar button and the top shirt button, which is controlled by Top Button Placement.
Button Spacing cannot be specified directly. It is automatically determined by the system based on the shirt Back Length, Posture, and Top Button Placement settings. Button Spacing options are 3 1/8″ (3.1″), 3 1/4″ (3.3″) or 3.5″.
By adjusting the spacing between the buttons slightly we’re able to better optimize the position of the bottom button on the shirt relative to the shirt tail (‘Bottom Distance’) and avoid it being too close or too far away from the end of the shirt.
Top Button Placement Options
We offer four different options: “Raised 1”, “Raised 1/2”, “Standard”, “Lowered 1/2”.
- Selecting Raised 1″ raises the first button on the placket of the shirt up 1″ from our standard. This decreases the space between the bottom of the collar band and this button from 2 7/8″ to 1 7/8″.
- Selecting Raised 1/2″ raises the first button on the placket of the shirt up 1/2″ from our standard. This decreases the space between the bottom of the collar band and this button from 2 7/8″ to 2 3/8″.
- Selecting Standard is the default setting. This centers the top button 2 7/8″ from the bottom of the collar band. *Note that our standard button placement is already just slightly lower than what many consider “normal”, so if you’re looking for a lower button placement on your first order, do not necessarily start with Lower 1/2″.
- Selecting Lowered 1/2″ lowers the first button on the placket of the shirt down 1/2″ from our standard. This increases the space between the bottom of the collar band and this button from 2 7/8″ to 3 3/8″.

Top Button Placement
Reasons to Change Top Button Placement
Most people won’t need to change the first button placement on their shirts, but here are some reasons to consider it.
The Placket Bump
The primary fit problem that can be addressed with button placement is when you notice a “bump” between the collar button and the first button on the placket. Generally this problem resolves itself when a tie is worn, and is not an issue if the collar is left unbuttoned. However, if you’re wearing the shirt buttoned all the way up without a tie, or if you have a particular posture that causes this to be a problem even with a tie on, you will want to consider this adjustment.

Dress Shirt Placket Bump
This issue can be improved or totally eliminated by raising the position of the first button on the placket. By raising this button 0.5″ or 1″, the space between the collar and top button is reduced and the placket becomes much more likely to lay flat to the body, regardless of your fit profile.
Perfecting Your Unbuttoned Look
Some guys prefer to wear the collar button and the top placket button unbuttoned, but find that this shows just a bit more chest than they are comfortable with. Switching to Raised 1/2″ or Raised 1″ raises the 2nd button placement by the same amount, which reduces the amount of chest that will show. This can help with hiding chest hair or a v-neck undershirt’s visibility. The images below illustrate how raising the top button can allow the second button to better cover your chest hair or v-neck undershirt.

Conversely, some guys like to wear their collars open, but keep all the buttons below the collar buttoned. If you wear your shirts like this, you may find that the top button placement is just a little too restricting for your taste. Switching to Lowered 1/2″ can help relax the look just slightly. The images below illustrate how the look can change when you alter the top button position and only unbutton the collar button. 