To add rear side pleats, a center box pleat, or center box pleat with a locker loop to your shirt, simply change the “Rear Pleats” selection within the Saved Size you want to use for the shirt, as follows:
- Make sure you’re logged in to your account and click this link to your Saved Sizes.
- Click on the Saved Size to which you would like to add Rear Pleats, a Center Box Pleat, or Locker Loop.
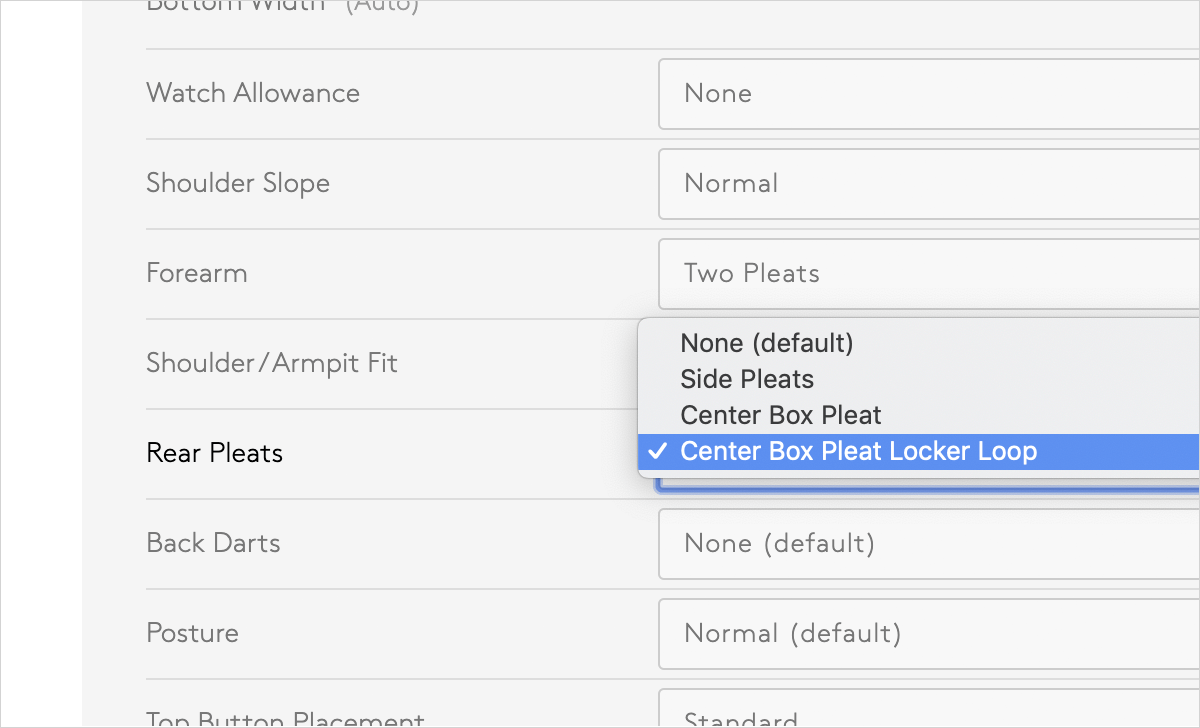
- Near the bottom of the list of shirt dimensions you’ll see “Rear Pleats.” Click on the dropdown menu next to it and choose the style of pleat you’d like.
- At this point you can either save this change by clicking “Save” on the upper right hand side of the page, or you can click the arrow button next to “Save” to save this as a new size, separate from the original size you chose. If you choose to do this, give it a clear name, such as “Favorite Fit with Pleats” or “Casual Locker Loop Fit,” so you’ll be able to identify it easily when you want to use it.
To learn more about dress shirt back pleat options, head over to this reference page we created.
Related Articles
- Dress Shirt Back Pleat Options No Back Pleats No pleats on the back of the shirt makes for a clean, minimal look. If you’re going for a more modern, slim look that is...
- Trouser Front Options: No Pleats, Single Pleats & Double Pleats We are excited to offer three trouser front options: No Pleats, Single Pleats, and Double Pleats. Each has a different use case, in terms of both fit and style. This...
- How to Create a Pleated Dress Pant Size Pleated trousers are constructed differently from non-pleated trousers and so they require an entirely new sewing pattern. The pleats are open when the garment measurements are taken, but...
- Managing Your Custom Shirt Style Profiles Creating A Style Profile Proper Cloth offers the ability to save your favorite collar, cuff, pocket, placket, yoke, button, and monogramming options as a ‘Style Profile’ in your...